I wanted it to be brown. I have brown wool, but it's the wrong weight. In the wool I had planned to use, I only have dark green, white and red. I realize that if I did the warp in green and the weft in red, it would likely appear brown from a distance, but when I twisted the two yarns together, there was still to much contrast for me. I didn't want a green and red flecked blanket! So I decided to dye the green. I looked at my large cone of wool yarn which weighed about a kilo and realized I'd have to skein it off before dyeing. I figured I'd skip a step and dye warp chains. This is a valid way to dye and often is used in painted warp techniques.
 |
| figure 8 tie on remaining warp length |
As I was winding my warp, I realized that this was a good time to document some of the ways to do this, or at least the way I was doing it this time. In order to let the dye circulate around the fibres, instead of choke ties, I use figure 8 ties. They keep the warp in order but still let the dye reach all the fibres. If you don't do this, you'll get tiny white spots... ask me how I know!
 I do put a choke tie at each end of the warp. I tie it really tightly. This keeps the warp in order it two places, so I can shake it out and still have control. I also tied the centre of the cross securely, although not so tight it's bunching together. Just enough so it's flat. There may be a bit of white there, but it's in the thrums or loom waste, so it's fine. I could tie at least the two cross ties near the very end tightly too, but I sometimes find it squashes up the warp for a bit down the line. Since I wasn't as generous with the loom waste as I usually am, I used figure 8 ties to be certain.
 The figure 8 ties down the rest of the warp are at least 1 per yard. I'd rather have two many ties, than end up with a tangled warp. Painting the warp and steaming it has little movement of the warp, so it's safer. However I'm kettle dyeing this, so tangling is more of an issue. Better safe than spending hours untangling. It's not like I have tons of extra yarn as I had only 1 cone of the green.

 I ended up changing my process slightly because of this dye running from the original skeins. Instead of dyeing in a deep kettle, where I was going to have to do 2 carefully calculated batches to hopefully the same colour, I used the pan I use for low immersion dyeing and zig zagged them fairly close together. I doubled up the vinegar but the same amount of salt and will add half the vinegar to start and the rest, half way through. I have a few concerns that something will not work right. The brown dye seems to have absorbed but there is still green seeping into the water. The yarn has no brown to it yet. I will play around with adding some red to it as well, since red and green make brown.
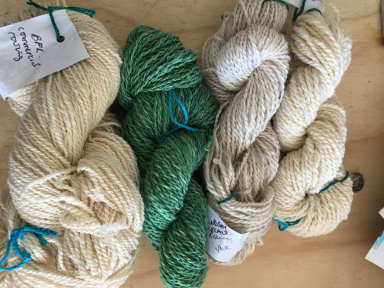
No comments:
Post a Comment