Pages

December 27, 2014

Fibre Processing Comparison

Way back in October, I had a bunch of Merino and some lovely fawn alpaca.  I was playing with the blending board and pulled off a bunch of rolags.  Because the Merino and Alpaca were of similar staple lengths and about 3-4 inches long, I decided to practice the long draw.   
The last skein in the photo is the first that I spun.   I used a traditional English type long draw or double drafting.  The rolags spun easily though you can see the uneveness in the blending.  It was a really nice skein and relatively consistent. 

 However, I realized then that I had more than enough fibre to do a bit of an experiment.  I divided up the rest of the rolags.  I ran one set through the drum carder a single time and the second set through the drum carder twice.   I rolled up each batt and attenuated the fibres from the centre.   I then spun the resulting roving with a similar long draw technique to the first skein.  

The first skein, directly from the blending board rolags is fairly consistent in grist and there are distinct areas of Alpaca and Merino.   The skein made from the drum carded batt carded only once, was much more difficult to keep consistent in grist.  There were still patchy areas which just wouldn't behave the way I wanted them too.  The third skein, which was from the twice drumcarded fibre, was much more consistent win grist, well blended and uniform.  

The skeins are all nice.  They are all close enough in grist to be used in a single project.  There are differences though, which show that you really do need to take fibre preparation into consideration as one of the factors in spinning yarn.  It was a fun little experiment.

I started knitting a pair of mittens with the fibre.  It knit up easily and is very soft.   I just got the tails sewn into this mitten.   I went to grab the second skein and I can't find it anywhere.  It seems that in the pre-holiday rush, my skeins were put in a safe place.   Now I have a single mitten that I cannot wet finish or block because I need it for a pattern for it's mate, whenever I find the missing skeins.


December 19, 2014

Kevin update

The other day, my friend Christiana asked about Kevin.   He's doing okay, grown up and maturing into a daddy's boy.  He knows what time his papa should be home from work and waits by the door and if he's home early, he'll run to the door as soon as he hears the truck drive up.  He whines incessantly if his papa is late and comes to him when he's called, just like a puppy.  When Kevin is home with me though, he spends much of his time like this.
 He loves to sleep on the rocking chair.  We think it's because when he was little, he was always falling off the back of the sofa or the chairs when he slept.  However, the rocking chair has a backward slope and it kept him from tumbling while he slept.  He must feel secure there.
When he's not sleeping, he likes to sit by the side window on his little bench and watch whatever is out there, birds, chickens, bunnies and even the neighbour's dogs. 


He loves to sit on my loom and catch the views from the front window as well. 

In the mornings you'll find him and my cat in my bedroom, snuggled on the plush blankie.  There are two cats in this photo!  Kevin sleeps on top but right in front of him, snuggled under the blanket is my cat.  They are often snuggled together this way.


 That being said, Kevin still likes to explore.   He was thrilled when we got our Christmas tree. It's a lovely, fragrant Balsam Fir, which Kevin seems to enjoy sniffing.  He seems to do that a lot.  We used a galvanized pail, with bricks and a drainage tile for a stand.  It's always been plenty sturdy for whatever tree we've had in the past.
A few minutes after Kevin's first tree sniffing session, I heard a crash and found him sitting innocently behind the tree, watching the drama unfold.   We spent the evening picking up ornaments, and mopping up about 8 litres of water from the rug!   I was thankful the vintage ornaments weren't on the tree yet, although a little ticked off that an awful lot of the glass ornaments on the tree were smashed in the fall.  However, that is a risk one takes when you use glass instead of plastic ornaments.  We have a new, larger, more secure stand now too.  

It's a good thing hubby thinks Kevin is cute!

December 04, 2014

Colours of December

It's early December.  We've had snow and it's melted.  We've had more snow and it melted.  Yesterday they changed the longterm weather forecast from another cold, snowy winter, dominated by a polar vortex, to hey, the El Nino will moderate things, so who knows what sort of weather we'll get.  Today the temperature is hoving a few degrees below freezing.  We're getting small bursts of sunshine once in a while, which is a lovely change to our normally dreary, grey days.   We get a lot of overcast days during the winter.

 One of the girls was brave enough to wander around outside.  These chooks aren't that fond of any snow on the ground.   We used to have some which would stoically head outside until the snow was so deep that they couldn't travel in it without bogging down.  These girls are wusses in comparison.

 View from behind the back fenceline. 

 Across the road.  Sometimes you can see the cows wandering through the trees and back field this time of year.  When winter sets in properly, they'll be housed in a nice warm barn, but until then, they are fun to watch.


The nice thing about being with the Carolinian Forest area is the variety of deciduous trees.  We have several nice oaks, which hold their leaves through most of the winter winds.   Interestingly Carolinian Forest is a Canadian term and it's U.S. counterpart is something like Eastern Woodlands.

November 28, 2014

Garnet Yarn

First take a bunch of yarn and cut it up into bits.  I'd have done smaller bits, but it's been a bit difficult because of that ->

I've no idea what I did, but I woke up one morning in pain.  After realizing it wasn't just a simple strain and it wasn't getting better by itself, the x-rays showed a fractured wrist bone and landed me in a splint for at least 2 - 3 weeks.  This is after several weeks of babying it, and being relatively unproductive, so I'm not too happy about this.  Not at all!  It is interfering with all sorts of activities.

So back to spinning.  Take a bunch of yarn and cut it up into bits.  I used leftover blended colours from Master Spinner level 2.  I used 3 different scraps and cut them into bits.   I found a bit of leftover Icelandic fibre from a previous project.

I started carding the Icelandic and once the fibres were blended and aligned, I put some of the chopped up pieces on the carder and continued carding, finally forming a rolag with the chopped up bits integrated into the fibres.

Then I spun the rolags, using a long draw.   Mainly the chopped up bits are securely spun into the singles.   But every once in a while, one of the bits gets flicked off the fibre.   It creates a fun yarn with a very simple technique.  It was also quite fun to spin.

November 23, 2014

Poured Candlemaking


 I had a whole post on hand dipping candles worked out, when I realized that I had only half the photos that I needed.  Instead, we get plain, poured, moulded candles.

Have a fire extinguisher in easy reach or make sure you know where it is.  I have one on a nearby kitchen shelf and a second one by the woodstove.

Wax is extremely flammable and for safety, use a double boiler for melting.  In this case, it's a stainless steel pot I use for crafts but not dyeing and a tin can, which is elevated from the pot bottom.  Normally I use a metal trivet, but I had bamboo skewers handy, and just made a triangle of those, on which to sit the pot.    


There is a variety of different suggestions for wax flashpoints out there.   Check with the manufacturer of the wax you're using to make sure you have the safe working temperatures.   Here I'm using a paraffin wax blend.   It melts at about 139° F and heats up quickly.  These will be scented candles, so I also check the flashpoint of the scented oils as well.  The colourant and scent mix well at 175° - 179° F.  I use a thermometer to keep track of the temperatures because while wax melts fairly slowly, once it's melted, it comes to temperature quite quickly.   I could speed up the melting process by chopping the wax into smaller pieces.  Don't leave the melting wax unattended!

While the wax is coming to temperature, get your moulds ready.   Cover a surface with paper if you so choose.  You will need your moulds, wick pins if you have them.  If not, some bamboo skewers and your wicks.    Put your scent and colourant in an easy to access place as well.


If your wax needs additives, add them first.  Then add the scent and finally the colourant.  This way you know for sure that you've got everything needed for that particular wax vat.   I add my scent and colourant once the wax gets to just above 175°F and by the time I've mixed it in, the wax temperature is 179°F.  I turn off the stove and pour into my moulds.   Normally my moulds would be all in a row for easy pouring but today I did things the hard way.  When pouring votives and tea lights, pour almost to the top, but not quite.  Too much of a space may leave a pour mark when you top up the wax, too little and you can't get perfect coverage on repouring.

 Because I don't have wick pins, I wait until the wax is just starting to cool on the edges and push the wick into the soft cooling wax on the bottom.   If wicks start to lean one way or another, I use skewers to keep them centred until the wax is solid.

When the wax cools, it sinks in the middle, leaving a well or indentation around the wick.   To fix this, reheat the remaining wax to about 10° - 15° F above the initial pour temperature.  Then pour some wax to top off the moulds.  With the glass containers, I only add enough wax to completely cover the top and not raise the depth of wax.  Sometimes you'll need to top up twice to get a completely smooth candle.  If a little bit of an uneven surface doesn't  bother you, then once should do it.


When completely cold, tap the bottom of the votive moulds to remove the candles.  Tealights and containers stay in the moulds.  Trim the wicks to about 1/4 inch.  It's recommended to wait 24 hours before burning.

I've used mottling wax here.  You can see the pink candles are flat, but rough on the edges where there wasn't quite enough space for topping off.  The purple/blue candles have a slight well in the centre, but nice edges.  It was a bit of a trade off there.  The container candle shows that my counter top is uneven, as the wax is slightly higher on one side than the other!


November 16, 2014

Historical Cooking

Yesterday, Westfield arranged for a day of historical cooking classes for the volunteers, with local food historian Carolyn Blackstock.  While we did a fair bit of cooking, there was a lot of time spent on food safety, woodstove and hearth cooking safety and making sure everyone was comfortable with the basics.  We also covered choosing and interpreting recipes.  While it was pretty basic in a lot of ways, and the instructor was a bit distracted at times, which caused the class participants to drift in their engagement to the topic, it was a lot of fun.   There were some great suggestions for resources, and a lot of upbeat ideas to get the enthusiasm revved back up.

Boiled pudding in a muslin pudding bag.
The morning session was on woodstove cooking, while the afternoon was on hearth cooking.  Because of the time of year, suet puddings were highlighted, including a boiled pudding in a pudding bag, a baked bread pudding, a stirred cornmeal pudding and a baked suet pudding.    As well, a simple sausage and potato dish, and a hot slaw were made, while the reflector roasted duck wasn't made due to time and the fact that the duck was missing. 

Boiled and/or steamed puddings are cakes which are cooked in a water bath.   When using a bag, the bag is first buttered and floured, before the batter is put in the bag.  After the bag is tied shut, with lots of room for expansion, the bag is dunked in boiling water and boiled for several hours, depending on the size of the pudding.  The larger the pudding, the more hours it takes to cook.   The batter isn't soaked and doesn't leak into the water because the boiling water immediately turns the butter/flour coating on the bag, to a glue like substance which seals the bag.   We also saw a very cool lidded metal pudding mould, which is now on my must have list.

I knew I'd forgotten my camera, but also forgot that I'd tossed my phone in my pocket until we were eating lunch.  In the afternoon we were at the inn, with it's large hearth and interestingly quirky andirons.  The cooking crane doesn't hang still, so the one andiron and a rock are used to control it.
Boiled cornmeal pudding
We started with a cornmeal pudding, which was boiled cornmeal with a few additions.  It was good enough, topped with molasses or butter if you chose.  It was an everyday sort of pudding, rather than something special, but definitely edible, though much less sweet than we are used to.
Breadcrumb pudding

We then moved on to a bread crumb based suet pudding.  The instructions gave the option of boiling or baking.    We pulled out a dutch oven, put the batter in a cake pan and baked the pudding with the coals.  For campfire/hearth cooking, a dutch oven with legs is preferable.  They usually have 3 legs, and a tight fitting, flat lid with a rim.    The lid holds coals so that the heat comes from both the bottom and the top for even baking.  One of the resources suggested using 1/3 of the coals on the bottom and 2/3 of the coals on top.   After half an hour, the dutch oven was opened and the pudding was tested.  It was close to done, but the quince sauce wasn't yet done, so the pudding was put back in the dutch oven to keep warm and bake a little more. 

The quince sauce was interesting because quinces aren't easily found in this area.  The were not quite ready to use, since they must sit and start to turn mushy before they are soft and sweet, but one of the strong gentlemen, with mad knife skills, peeled and chopped the quince, which were then tossed in a pot over the fire, to stew.   When they were soft enough, we sampled the quince with the pudding and it was a brilliantly nice combination.  This pudding was a very basic pudding, though it had a lot of lemon in it.  The two were a nice treat.

All in all, it was a great day!


November 12, 2014

Spinning, spinning, spinning

Much spinning has been happening.  I've been playing with colour combinations in processing, so hackling, carding etc.  I've been trying for reproduceable results but it turns out that my little scale that I've been using to weigh things is finally seeing it's end of usefulness and no longer weighs accurately.  It's great for general and larger amounts but I can't get small amounts weighed out evenly anymore.  This means that when I card each rolag, I can't guarantee there is the same amount of fibre in each one.  This makes for uneven results once in a while.  They are still pretty though.
And very colourful.  The pink one is two different shades of pink which looked like they had a huge amount of contrast before spinning.  After they were spun up, not so much!  But I do love the yarn.
Practicing the long draw.  Because, despite the fact that I spin a lot, I still practice.   It's the only way to get consistency and control.  So once in a while, I just grab some fibre and practice something.   Since the long draw is not natural for me, I often practice it, in hopes of becoming consistent and have control of making finer and thicker yarns.  This is superwash merino and alpaca.  I just wish I'd processed the alpaca before I stuck the locks on the blending board and used handcards or the drum carder instead.  This is making an uneven yarn which of course drives me a bit batty.   I'm hoping there will be enough for mittens when I'm done.

October 31, 2014

Halloween Treats

Today`s treat comes from the 1845 edition of The Economical Housekeeper, by Mrs. E.A. Howland.

103 Gingersnaps

Boil a tea-cupful of molasses, and add two spoonfuls of butter, one spoonful of ginger, and one tea-spoonful of saleratus, stir the flour in when it is hot, roll it thin, cut into rounds.  Bake quick.

The recipe has no sweetener save the molasses and very little butter.   A tea-cup is 4 ounces or 1/2 cup.  Because the measurement of saleratus is specific on the size of spoon, I guessed that the un-specified spoon was most likely a tablespoon.  It took 1 1/2 cups of flour to make a cookie dough from the wet ingredients.

So 1/2 cup or 4 oz molasses
2 tbsn butter
1 tbsn ginger
1 tsp baking soda
1 1/2 cups flour  


Mix the flour and the ginger, and set aside.  In a pot or sauce pan, put the molasses and butter.  Bring to a boil and add the baking soda.  It will foam up a bit.   Take the pot off the heat, stir in the flour/ginger mixture.   The recipe says to simply roll it out, but it's a fairly stiff yet sticky dough, so I wrapped it in plastic film wrap and set it aside for 15 minutes.   It was still sticky, but more pliable.  I rolled it out both on flour and on sugar.  The flour worked best.  The sugar caramelized a bit more than I'd prefer but it did taste good.   The dough rolled quite thin with ease and I cut out various shapes.  I popped them onto a cookie sheet and baked them at 350° for 4 - 5 minutes.  Doesn't take long to bake these babies!

In re-rolling the scraps, I had to add a few drops of water, squish them together and let them set for a while, so the moisture could equalize through the dough scraps.  I was only able to re-use the scraps once.  Next time I'd just roll them into a log and slice, so as to avoid wasting the dough.  It is the Economical Housekeeper after all.

The cookie dough is definitely not sweet, but still quite tasty. I was amazed at the fact that though the dough was sturdy, the cookie is not.  It's not delicate and flaky by any means, but it wasn't tough and gave a satisfying snap.  While I prefer the depth of flavour other ginger cookie recipes might have with multiple spices, this recipe was easy, cheap and still satisfyingly good. 

October 28, 2014

Halloween Sewing

Way back in the summer, my daughter asked me to make her a Gryffindor House Hogwarts cloak for her Halloween costume.  She's always thought of these things much in advance and thankfully gave me lots of warning.  A couple of weeks ago, she asked me how it was coming along.  So of course, I sprang into action.  I figured it would take a couple of hours, but really, it took me the better part of a day and then some.  You know, because I had to draft out the pattern from a little diagram and had to make it durable and clothing like, instead of just a one use costume.  This Hogwarts cloak could be handed down to her grandkids, if she were to have any!

The sleeves had a funky design, that I would change a bit if I ever made a second one.  Here it is half finished.  Of course I don't have a photo of it finished, because I got the last hem stitch in 2 minutes before we had to leave to drop it off on Saturday!  She promised me a photo of her as Hermione though. 

Then I had to work on a project for myself.  A project for no reason other than I felt like it.  It's not like I'll be going anywhere for Halloween, nor is it likely that we'll even have a single kid knock at our door where we live.  We've had one in the past 5 years and that was several years ago.

This hat is made of felt.  I could only find cheap craft felt, so it's interlined, plus the brim is wired, twice, since the first time wasn't strong enough for my liking.  The fabric store had every colour and width of cotton bias tape, except for black in the size I wanted.  They had some sort of shiny, man-made fibre bias tape  in the right width, in black, which I used.  I had to slip stitch it down by hand, as it was pretty slippery.   It looks quite nice though.

The flowers are made from scraps of the hat felt, some very dark Blackwatch plaid ribbon (much darker than the photo), wire and

glass beads.   They were super easy to make, being a circle of felt, cut in a spiral, rewound and then glued on the bottoms.  I used a fabric glue for the flowers, but hand stitched everything on to the hat, because my glue gun died last year and I forgot to replace it.   It was at least 15 years old, so was likely about time.  But I won't get back into town before Friday, so hand sewing it was.

If I do this again, I think I'll try a funky purple or grey, with black design quilting cotton, with big tulle and silk or paper accordion pleated poofy flowers.  And I'll replace the glue gun, just for speed and simplicity. Or just maybe I'll weave the fabric first.......


October 26, 2014

Checking Spinning Wheel Ratios

Modern spinning wheels usually come with a description that includes whorl ratios.  For example, the Kromski Sonata description says that the standard flyer has 3 ratios: 6.7:1, 12.5:1, and 14:1.   This describes the number of times the bobbin rotates during each full rotation of the drive wheel.   A number of wheel manufacturers round the numbers up for simplicity, and humidity may affect the ratios as well.  The problem is of course that if the ratios aren't exactly as stated, the twist math calculations go out the window when you actually try to spin to a particular tpi (twist per inch).   It's best to check them when you first try out a wheel and then as weather or humidity changes.  With my wheels, once I've checked them a couple of times, I found them to be stable but wood contracts and expands sometimes, so it's better to be sure.

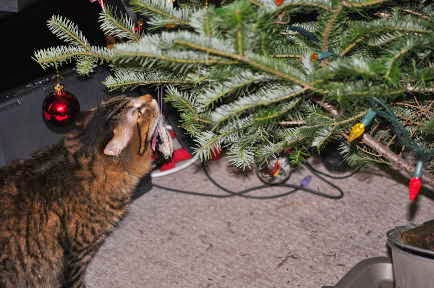
Starting point for checking wheel ratios
The easiest way to check the ratios is with a little bit of tape and a few minutes to hand manipulate the wheel.    I use masking tape because if you remove it right after you've used it, it doesn't leave any residue.   I would normally use the green painter's masking tape, but didn't have any, so the regular masking tape worked just fine.  I put the flyer arms so that they are vertical, just for convenience sake.  It doesn't really matter but I find it an easier visual.  I put a little piece of tape at the top edge of the whorl that I'm testing.   I also put a piece of tape on the drive wheel, directly under the tape on the whorl.  This is the even starting point.  Now it's simply a matter of hand turning the drive wheel and counting the bobbin rotations.

The bobbin will rotate faster than the drive wheel.  The aim is to find out how many times the bobbin rotates completely for one rotation of the drive wheel.  Turn slowly so as not to miss-count.  It's easier on the largest whorl, but on the smallest one, it's much easier to miss counting a rotation.    When you get to the end, there is a good chance that the two pieces of masking tape will not line up for a full rotation.  Then you need to bring the drive wheel back to the starting point, and see how far the bobbin tape has gone past the initial starting point.  This will give you a fraction of a turn.   Then you have to decide what to do with that fraction.  

If the fraction is close to a whole number, I tend to round up because the math with whole numbers is so much easier.  With my Minstrel, I know that the one whorl requires me to add an extra treadle every once in a while to make up for that difference or measure my drafting zone with a scant inch, instead of a full inch.

There are three whorl groves on the regular flyer.  My count for this wheel was 6.5:1, 12:1, 14:1.    I'll have to do some experimenting to see if that half rotation makes a difference to my spinning.   If my drafting length is accurate it could be an issue.  We'll have to see.  As it is, my default ratio on the Minstrel is 8:1, for just general spinning.  The Sonata misses that ratio on the regular flyer, so I'm going to have to make adjustments for that.

Bamboo/Yak on the new Sonata
Are wheel ratios important?  For general spinning it's good to know that the smaller the whorl, the more twist per drive wheel rotation.  For a thin, tightly spun yarn, having a whorl with a higher ratio means less treadles, which is less work.  You can treadle in a calm, relaxing fashion instead of speeding up to add more treadles per drafting zone.  The larger whorl will give you less twists for that same drafting zone, so your thicker, airy yarns also can be done using that same treadling speed.   It's when you want to spin something specific, like duplicating a yarn that you can't find any longer, or making a yarn for a particular purpose, such as a 3 ply sock yarn, where a higher twist per inch will make a more durable pair of socks, that knowing the specifics about your ratios will make a huge impact.

For the DH, who mentioned that I neglected this in my Fibre Festival post - yes, a Sonata followed me home last weekend.   I've been looking for a used one for over 18 months and haven't found one yet.  All that time I've been saving for this.  Finally I figured it was now or never, in order to get familiar enough with the wheel before level 6.  There is a good chance I'll have to travel for my Master Spinner level 6 and neither of my other wheels will do that, certainly not by air.  The smallest, which was my travel wheel doesn't have the versatility for the required spinning.  Twice I've had to switch it out for the Minstrel  when at locally held Master Spinner classes, which is a pain because it doesn't really fit in the little parcel area of the truck. It's just not as versatile a wheel as the others.  The Sonata folds up into a backpack, has a 19in drive wheel and still weighs less than 12 lbs.  It has 3 standard ratios and one can get both a jumbo flyer and a faster flyer for it if needed, which make a total of 9 different ratios from 5:1 - 18:1.

The last time I went to Olds, I used a rented wheel, which was fine, but I didn't have the control that I would want to have for a testing year.   Could I afford it?  Not really, but I tell myself that I really couldn't not to either.  I'm extremely happy with it though.  I can see selling off my Mazurka at some point in time because right now, I can't imagine using it much after this, as pretty a wheel as it is.

October 20, 2014

Fleecy Colours in my studio-

Or Stash aquisition beyond reasonable proportions - (all 10 lbs of it!)

The Woodstock Fleece Festival was Saturday.  Normally I'm found demonstrating spinning at the guild booth, but this year I was helping the guild with a class in the afternoon, so the morning was spent shopping.  I neglected to bring my list of things I'd forgotten to add to suppliers orders.  Places like Gemini Fibres will order and bring equipment to the Fleece Festival for pick up, which saves me either shipping or a rather long drive.   The Fibre Garden is my absolute favourite place to shop for spinning fibres.   They have  a fantastic selection of different fibres, reasonable prices, fabulous sales almost every month, and at least pretend that they don't mind adding to my order when I email them with an order addition two days before the Fleece Festival, when I know they are packing.

After picking up the items I'd ordered, I totally forgot about the dyed silk tussah and fine hemp roving that I wanted, and possibly some more coloured cotton sliver.  I was tempted by spectacular Icelandic fleeces, lots of Alpaca but resisted.   Instead, I was lured by pretty colours of superwash Merino mill ends which were inexpensive and so pretty.  Mixed with some nylon, these will make gorgeous sock yarns.  I can't believe that I didn't get the day glow yellow/green and some black.  It would have made perfect socks for Halloween!  (I keep wanting to put the apostrophe in Hallowe'en, but it seems to be constantly rejected by the all knowing spell checks)   I also found lots of white in sock yarn blends, and exotic Merino, Cashmere, Silk blends - also mill ends, but they card up so easily and spin nicely.  

I was playing with acid dyes a few days before when the skies were, once again, grey and dismal.   This is all Blue Faced Leicester.  I was trying new techniques, hence the odd interesting colour blends.  It's amazing that a length of fibre which makes one wonder why you did it in the first place, looks great when braided up.  The top right braid in the pinky red and light blues, looks awesome braided, but a little too much like cotton candy when unbraided. 


Playing around with little purple rolag/puni.  It's some purple Merino, tussah silk, sparkle on (nylon) and some bits of dark purple which I cannot remember even adding to this blend.  The dark purple is really short fibre, obviously wool and very tufty.  It makes interesting little nubs in the yarn, which I'll admit to pulling a lot of the larger,  globs out of the fibre as I get to them, if they don't seem to want to draft out nicely. 

The finished yarn is rather nice, considering I really hadn't put any thought into the yarn.  I was simply testing out a wheel and just wanted to see how it spun.    It spins like a dream.  The treadling action is very easy and incredibly smooth.   The flyer barely whispers as it spins around,  sweet murmurs, declarations of love with each stroke of the treadle.   It's a modern wheel though; very modern.  It folds into a backpack for travel and did I mention, it looks rather like a modern wheel?  But wow, it spins so sweetly.   The Kromski Sonata would make a lovely addition to any spinning wheel stable.

October 12, 2014

Spinning for fun

I recently participated in a spinners swap.  I sent off a packet of goodies and in return, I received all this bounty.  The pink and black project bag is a perfect pink and big enough to hold a sweater or everything I'll need to take my wheel out to a guild spin in.     The braid of fibre is pretty wonderful.  I'm not sure exactly what fibre it is, but probably Merino, Rambouillet or something similar since it's a soft, shorter/medium staple with a very fine, high crimp.

I've been feeling a little hung up on my homework.  The rattling off of small sample skein after small sample skein of yarn was getting to me.  I mean, this is year 5 and I've not done a huge amount of just fun spinning in there.  So.... I took a break.  Yesterday afternoon I undid the braid.  It was a crochet type chain, so just unraveled nicely.   I pulled a piece off, about 1 m long.  I divided the strip of roving into two.    I cleared off the bobbin that was on the wheel and tossed the bit of hemp singles that I was spinning by accident - stupid story there.  

This is three lengths of roving stripped in halves.   I made sure to keep the beginning and ends the same.  I labeled the beginning bit, with a numbered post-it note, so I could keep the lengths in order.  Hopefully I'll be able to match the colour changes when I ply the singles.

The post it note labels are just ripped part way down, folded over the end and then secured with the sticky bits together.   It would have looked much neater if I'd bothered to cut little squares and punch a hole in the middle, to thread the roving end through.  However, this is fast and will last as long as I need it too.  The other way would be more secure and long lasting if I needed to store the project for a while, but I don't anticipate having to store this for long.  If I do, I'll cut the little squares of card stock, punch the hole in the middle, label them properly and thread the end of the roving through the hole.


This is what I've spun since yesterday afternoon.  The subtle changes of the green are lovely.  It started with a pale yellowy green which reminded me of a spring green and then shifted to a greeny/brown.  Now the green has a little more blue in it and is brighter once again.  It's going to be so pretty when plied up.

Better yet, I'm having a lot of fun with this.  It's very refreshing to just play without having to worry about counting treadles and all the other stuff that goes into homework skeins.   On the other hand, I realize that I tend to sort of count anyway and get into a rhythm, but it's automatic, not something I'm obsessing over.  

October 09, 2014

Geranium slips and socks

Every spring I plant a couple of Geraniums.  They come a variety of shades, especially shades of pink and they are readily available.  I found that for years, I would miss the sale where the potting Geraniums are on sale for .58 cents.   I decided one fall, that I was tired of that and took cuttings of the plants which were colours that I liked.  There are always pink Geraniums available, but some years they aren't actually pink!   They can be peachy pink, or pale pink, or stripey pink.  I had the perfect pink Geranium that year.  I loped off a bunch of stem pieces into 3-5 inch lengths.  I snipped off the flowering bit, trimmed off any leaves from the lower half of the stem and stuck them into a little jar of water.   I stuck the jar in a sunny window and about half of them rooted.  I usually put them into the front bathroom window, where it is very sunny but quite cool.  I've found however that I tend to forget to water them, which adversely affects the rooting rate for some reason.

Bright Pink Geraniums
I've found out since then that I get better rooting rates if I just stick the cuttings directly into fresh potting soil.  It's fast and easy.  I don't use rooting compound because I've read that Geraniums don't need it.  The fact that it's not actually easy to find, helps with the not using it either.

Dark Pink/Burgundy Trailing Geraniums
With the temperatures dropping and getting close to first frost, I figured it was time to snip my summer's plants and re-root them.   I got out my secateurs (don't you just love that word) and went to work.   My pink Geraniums cuttings are in a rectangular planter box.  I put one extra cutting into a pot, along with a rooted Geranium which I cut severely back and repotted.  Not only did I trim back about 2/3 of the branches, but I trimmed the roots back a few inches as well.   This is my security plant, in the event that for some strange reason, all my cuttings fail this year.  I also put the pots in a sunny window, in the livingroom, where I'll remember to water them!
I've had this sock yarn in wait for a while. It's bright, it's soft and it's a tad thicker than I normally use.  I had to go up a needle size and use a slightly smaller stitch count.   I'm doing a simple spiral pattern with a single traveling/cable stitch.   It's fast, interesting and unlike cabling with multiple stitches, I don't need a cable needle.   The downside to this yarn is that it was a gift and it had a few moth nibbled breaks in it.  Regardless, it's still sturdy everywhere else, it's bright and an interesting colour that I might not have chosen for myself.


October 05, 2014

Love that Lustreware

We were in town and had a few minutes to spare.   We decided to wander through the antique/flea market warehouse.   It's one of those places with lots of little rented booths full of everything from old toys and collectables, old furniture, antiques and everything in between.   Of course there were items which caught my eye, like a handcrank Singer 99k which looked like it had never been used and an old flax spinning wheel in perfect condition.  However, I had exactly a single $5 bill in my pocket, a toonie and a half a handful of nickles and dimes.   Not enough for a big shopping spree, that's for certain.

However for a grand total of $5.65, I found  some lustreware.  I love lustreware.  It's not horribly old.  While there are lustreware techniques which date to Coptic Egypt and the Roman times, and some different styles from the 19th century, most of what I love dates from1930 - 1950.  It's pretty.  It's shiny and it's relatively cheap.  I mean if  you only want a complete set, you can pay a pretty penny for it, but for odds and ends, incomplete sets and such, it's often priced to sell quickly.   I have full sized tea cups/saucers from a variety of different sets, a teapot, a few small plates and a creamer.    I also have several different partial sets of doll dishes.

Lustreware doll dinner service

This is the most complete set of lustreware doll dishes that I have.  At some point it was probably a complete dinner service set.  I've seen some sets which even include silverware! This set still has the teapot, a tureen, what I'm thinking is some sort of gravy dish, a platter, both creamer and sugar bowl, all the saucers but only 2 tea cups and 5 plates.


Today I found this small set of doll dishes for $5.  It's a lovely pattern and since most of the lustreware I find is gold/ orange, the blue stands out nicely. It's also nice that this set has a
Lustreware doll dishes
tea pot.  Most of my doll dishes don't have tea pots.  I  played with china tea sets when I was a child though they weren't nearly as fine and pretty, being more modern.   I'm certain that the tea pot was always the first item to break.

Included in this batch of dishes was this smaller but full sized sugar bowl.  Noritake seems to be the name printed on the bottom of a lot of lustreware dishes, as is on the bottom of this little pot.  It's missing a spoon, but I have a tiny metal spoon which would fit nicely.

Lustreware sugar bowl
So for $5.65 ( gotta add those taxes), I got both the doll dishes and the little sugar bowl.  I was pretty happy with that deal today.