Pages

December 31, 2010

Weaving out the old year..

It took 2 days to thread the heddles, sley the reed and tension it up evenly.  Really, I did most of it in a day but the second day I had only a couple of inches left to thread and the reed to sley, which went quite well.   It's threaded at a sett of 20 epi, using 2/8 cotton in natural and blue.  The draft is easy peasy to thread and the only real requirements are 2 shuttles and being able to count to 8, since it is a 16 thread repeat pattern with a switch in order after 8 threads.  There is a good online draft of the log cabin colour threading here, at All Fiber Arts .   I'm doing a tabby, so all the pattern is simply in the order of throwing the shuttles!  How perfect is that for stress free weaving after muddling through homework?


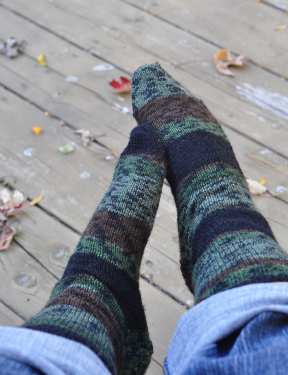
The grey and white colourwork socks have been frogged 4  times and reknit.  First I had cast on too few stitches, then the border was wrong, so I redrew the pattern.  I got it wrong again and redid it a second time.  Finally I changed the colourwork border to stripes and it flew along until I made a mistake in the pattern and realized that I need a way to keep track of the rows that I'm on more easily.  I'm now trying to decide whether to forge through this project, or set it aside for another time as I've lots of spiffy new sock patterns to try out.


Gratuitious cat and dog picture!  The dog loves to sneak up on the couch to sleep and the cat loves to sleep there when we leave a blanket out, though normally he only sleeps on the wool blanket!   Today the cat was in the dog's preferred spot and the dog was trying to sneak on the couch as well.  Oddly enough all this happened when I was in the room and watching!  Brave puppy!  It's an interesting way to end the year.

Tonight, I will be celebrating by snuggling down with seed catalogues to start narrowing down decisions for the spring garden.  I may even toast the New year with a small sip of Ice wine, although I don't normally drink.   May the New Year bring much joy and sunshine to all.

December 30, 2010

December Colour Wrap up

It's been a white month here.  I missed November's photos and I'm sorely wishing I had that sort of weather and photos to post now.  We've hardly had any blue sky or sunshine.  There has been lots of snow, dreary grey skies and today, it's drizzling, so not only is it wet, but foggy!  blech..

 Taken during a snow fall, just at first light.  Poor chooks had to wait a few minutes for their water as I ran back inside for the camera.  The heavy, wet and dense snow, with the early morning light made the entire landscape look like a black and white photo!

The same snowfall, although the woodpile added a bit of colour, the only colour I could see.

 The short winter hike... looking for colour and playing with RAW.  I'd love to know exactly what I am doing when I'm playing with moving contrast, colour and other lines to adjust the colours and depth.  It's very much like playing in a darkroom with exposures.  I brought up the contrast and some of the warmer colours in a bid to soften this photo and add whatever colour I could, while still letting it look natural.

 Another winter hike photo, along the river.  There were ducks.  They were swimming faster than I was walking, so catching them on film was tricky.  Please note, there are no ducks in this photo!

All the photos are dark and gloomy.  Our sun is rather low in the sky.  Our days are short and it's still dark at 7 am.   Making the photos brighter looked to unrealistic, so I left them like it was.   Now, if the sun were shining, all that white would reflect the light.  It would be gloriously bright and almost blinding! 

December 24, 2010

On Cookies of all kinds!

 Yesterday, I spent the morning visiting with a friend, fully intending to race home and start the holiday baking, which I'd been putting off.  Putting it off mainly because I wanted to have some left for the holidays and the hungry boy people here would scarf it all down beforehand otherwise!  However, my friend gave me a lovely pressie,  Knit. Sock. Love.  by Cookie A, autographed by the author no less!  It's a beautiful book to look at and is full of brilliant sock patterns as well.  I got home and found the fire almost out... that lead to waiting for the stove to cool enough to clean it out.  After I rebuilt the fire,  I had a cup of tea and a gander at the book instead of baking.. big mistake as my afternoon baking session disappeared into a relaxing afternoon of brilliant book perusing and napping!  Oh well..  Today is definitely baking day. 

The must have cookies are just out of the oven.  The official name is Spicy Raisin Crinkles, but we call them Ginger Crinkles, because we've bumped up the ginger to give them a bit of zip.

Ginger Crinkles
3/4 cup unsalted  butter
1 cup white sugar
1/2 cup molasses
1 egg
2 cups flour
2 tsp baking soda
2 tsp cinnamon
1 tsp ginger
1/4 tsp salt
1 cup raisins
1/3 cup finely chopped crystalized (candied) ginger
extra sugar for rolling cookies in

oven - 350, 10 minutes or until just starting to barely brown on the bottom
cream butter and sugar, add molasses and egg, beating well after each addition.   Stir in dry ingredients, raisins and ginger.   Roll cookie dough into 1 inch balls.  Coat each cookie ball in sugar by rolling it around in the sugar.    Place on parchment covered baking sheet.  Press down with a fork or not as you choose.  I don't worry about it.  They don't flatten out totally, but do stay moist and chewy in the middle.  Bake for about 10 minutes.

The filled date cookies are out of the oven and assembled.  Talk about yummy and because they are loaded with oatmeal and fruits -yes, dates are a fruit, you almost don't feel too guilty eating this gems.  I couldn't find the medium sized round cookie cutter and the large one is biscuit sized, so way too big.  This year, we got stars since it was the only cookie cutter the right size.  Well, there was the dog bone one, but some how that didn't seem appropriately festive!

The cherry nut cookies may be a miss this year because I have 2 things left to sew and I cannot sew and bake cookies at the same time!    I could get the pies in the oven and start to sew, since they have a longer and more flexible baking time, so I'm not likely to forget them or at least the one more minute to finish a seam won't really affect the pie in the same way it will the cookies.

So why am I wasting my time on the computer when I have so many things to do ?  Tea break.  If I don't sit down to drink my tea, I'll set it down someplace, forget about it and not find it again until it's stone cold and miserable.  This way, I get to drink it nice and hot and get a break:)   The bonus is that I know exactly where my tea mug is for the next cuppa!     Happy Christmas!


.  


December 21, 2010

Winding Warps and winterscapes

I had this wonderful vision of weaving a set of tea towels.   I thought pink, purple or turquoise and navy would be bright and cheerful.  My second choice would have been yellows, oranges and bright greens.  I looked through the stash I could find..  taupe, off white navy and a tiny bit of yellow.  When we packed away when we were clearing out the sewing room, ostensibly to see what was behind the icky 70's panelling but instead it turned into a makeshift  guest room.   I don't know where the box of yarn cones and tubes is hiding right now!  At least I know it's "safe", if that's really any consolation.

So I worked up a blue and white warp in 2/8 unmercerized cotton.  It's going to be a log cabin pattern.  Simple yes, but I'm starting into my homework for level 2 and want something on the warp I can play with, that will take little concentration and be fun.  Level one took so much energy that I didn't warp the loom up the whole time I was working on the homework.  This time, there will be a warp on the loom so I can weave when I need to feel like I'm doing something productive.   Believe me, a gazillion 10 yard sample skeins, even ones to certain specifications, does not feel productive at times.  Of course, by the time I get to towel 5, I'll probably be kicking myself for putting on such a long warp with no options for variation.

On Sunday we went out for a short hike and photoshoot.  It was short because not all of us were dressed for the weather!  I played around with shooting RAW for the first time.   Not sure if I want to use that much memory each and every time I take a photo though.  I really did like the processing though and I was just playing around without any idea what I was really doing.   I think I need more info on this before I jump in to it with abandon.

The trail was along the river and fairly sheltered.   The water is running still, so not frozen in this part of the river.  While it wasn't snowing, we had our normal winter grey sky.  I would so like to have some real sunshine with a blue sky!  

The chooks are still laying though not as heavily as before.  We're still getting 3-5 eggs a day, good, solid big eggs since they aren't all laying every day.  As the days get longer, they should increase production again.  I think in the spring, when we get our meaties, I'll look for some new replacement hens.  Not that we need them right away, but I've got this idea that maybe some Chanteclers would be nice or maybe a hardy hen that lays dark brown eggs.   Of course that would mean expanding the hen house a bit and making their room bigger.  There's lots of space though, it must means adding a bit and moving a wall.

December 14, 2010

Rainbow of Yarn

I was playing around with blending coloured fibres the past few days.  Starting with 3 primaries, I blended the colours to make 3 secondary and 6 tertiary colours.  It is so cool to see the colours changing while carding them.   I carded them with hand carders first but the blue fibres were pretty sketchy; shorter than either the red or yellow fibres and with a different texture.  They didn't blend easily at all.   In the end, I had to run the two colour ranges with blue though the drum carder and even after multiple passes, I couldn't get it to blend evenly, due mainly I think to the variances in staple length.

Regardless, it was a fun activity but time consuming.  I think I've spent a good part of this week just working on blending and spinning small amounts.   Each colour range took  much experimentation to get it right and none of the "recipes" were the same, so I couldn't just assume that because blue and yellow took a certain ratio to make a secondary green, that red and blue would take the same ratio to make the secondary purple. 

I also finished plying the hood project singles.  I've a bunch of skeins ready to go, especially if I ignore the plying twist differences.  I also spun up a small skein of Dyer's Knotweed dyed roving from earlier this fall, just in case I needed a bit more colour.  It's a pretty blue.  I ran the roving through the drum carder to blend it nicely, for a fairly even blend.  I say fairly because there are a few differences and I didn't take the extra step of blending the carded batts together to get a more even colour.   This is merino rovings and I didn't want to risk getting any neps or noils, so stopped when the batts were lovely, light, fluffy and perfect.  I tried to match the Knotweed merino in size with the Romney hood project yarns in case I wanted to make something out of them, so I'd have enough yarn.   But my little old imagination keeps on wandering toward the rainbow colours.   Except that I really don't want to blend and spin enough for a blanket or some such thing, wouldn't they make a cool colour gamp project?

I ended up fulling the hood fabric a bit more.  I tossed it in the washer for a few minutes but got distracted and it was in there for a couple of minutes more than I'd intended.  I spun out the water and layed the fabric over the kindling bucket to dry in front of the fire.  The cat looked disdainfully at it until it started to dry a bit.  Then it was deemed a good place to sleep!   In the end, I'm really happy I left it in the washer for the few extra minutes.   It's soft and yummy now.  It will make the perfect hood!  It's interesting that the stripes show up quite well from the Z/S differences but the broken diamond pattern is lost.

December 12, 2010

Tis the Season, I guess

A few weeks ago, my sweetie took me to a little conservation area for a hike and a photo shoot.  The picture taking part at least, we try to do on a regular basis.  The hike was an incredibly nice bonus.   We'd never been to that particular spot before and were amazed at how busy it was, despite the fact it was off season.   It was beautiful, with a reasonably well groomed trail but not so much so that it was like city walking.  We tried one local trail a while back but found it to be paved bike trails, which I just hated walking on.

 This is what the trail looked like at the beginning.  The greens were pretty vibrant for late November.

 One of the treed areas, probably white pine.  For many years all reforestation was done with white pine, even though we are on the edge of Carolinian forest.  There should be many more deciduous trees here!
  Still you can't knock how pretty the light is streaming through the trees.

 The sky was blue.   I like blue skies.  In the winter, we seem to get few of them.

 This is the remains of a glade filled with Golden Rod.  I need to go back later next summer because the colours would be spectacular.

My back yard today.  This is a colour photo, there just isn't any colour!

December 09, 2010

Off the Loom

It's off the loom.   Weaving it took way longer than it should have.   Between "real" life happening and dark gloomy skies it took a concerted effort to sit down and weave.   For some reason, when it's miserable outside, I just find it difficult to get started weaving, despite 2 large picture windows cornering my loom.   But it's off, it's wet finished and is out drying now.   It's too cold outside to dry it outside, which would be my preference.   I think I may want to full it up a little bit more, but will wait until it's dry to tell for certain.

The colour in the photo isn't accurate as it is more brown than grey now that it is washed and sitting in the sunshine.    Normally I'd weave as far into the loom waste as I can go without skipping threads or distorting things.   However by the time I got to the end of my required bit for weaving, the sizing was starting to wear off and a few threads snapped.   I decided that I wasn't going to fight to get the last few inches out of the handspun.  Instead, I would just weave to my planned length and be done with it.

Interestingly enough, with the projects like this I've done on the jack loom, it was difficult to keep the weft from packing in more densely than I wanted.  With the Fanny, it's the total opposite.  I have to be careful it's not to lightly beaten.   Not better or worse, just different.  Also, I had more than enough spun for the weft, perhaps because of the above.   At any rate, I've left over Z and S singles.  I'll probably just ply them together and stash them for some future project, along with the rest of the fleece.

Now, to find my hood pattern and get the final stages of the Saxon hood project started. 

The next project will have some COLOUR!  Lots and lots of colour!  One of those colours will not be brownish-grey!

December 01, 2010

Phew, what a week!

Two days before my son's birthday, he mentioned to me that he really wanted a new toque as a gift.  I thought about it and realized he wanted me to knit him a toque rather than purchase one.  Luckily I had some commercial grey, marled yarn on hand, so he got his hand knit toque, just not with handspun yarn.  Because I didn't have a pattern, I sort of made it up as I went along.  There were a couple of false starts until I got the correct number of stitches on to make a hat that would fit.   Then it was 2 days with lots of knitting, although it did knit of fairly quickly all things considered.

I had to make a cake in there as well.  My kids get to choose what we eat for dinner (within reason) and what they want for a cake.   My oldest son has always specified anything but chocolate, my youngest usually wants anything as long as it's chocolate.  My daughter goes for out of season shortcakes and the middle son has asked, every year since he was 4, for Worms in Dirt.  That's a nasty but somewhat tasty concoction of graham cracker crumb base, chocolate pudding, Coolwhip topping and ground chocolate cream filled cookies, topped with more cookie crumbs and gummy worms.  Luckily it's only once a year, but I swear I've made 22 of those in a row!

The Saxon hood project is going along slowly.  I've been putting off weaving and finally, one day when I looked out the window, it struck me that the colour of the yarn is not only the same colour as our deck, but also the colour of the dreary winterscape outside.  It is the same colour as our driveway, the roadside shoulder, the trees and branches.  Mix that with a miserable grey winter sky and lots of rain, I'm just begging for something fun.   I so want to put on a new warp, one for a belt which I owe a friend and the other for a guitar strap for an amazing guitarist, who has asked me for a guitar strap, not necessarily handwoven.  A trip to the music store showed me that I disliked the commercial straps, stamped with store advertizing and made of ugly, nylon webbing.

The new walnut shuttle does the trick for keeping the Z and S twist yarns organized, but it's a bit too light and way too slippery.  It flies across the warp (I don't think that the counterbalance loom has a shuttle race) and off the other side with regularity.  If it were any heavier, I swear I would have put it through the picture window several times, but as it is, it just tumbles under the plant table, terrifying the sleeping cat and making me crawl on my belly to reach it!

I started a new pair of socks.  I used to do lots of colourwork, both stranded and intarsia, but it's been years.  These socks are stranded colourwork - like fairisle stitches, but fairisle is specific type of patterns, and this is a funky deer pattern.    If you're on Ravelry, check out Anne Rutten's deer pattern.  After redoing the cuff and first row of colourwork 3 times, I've finally got it right.  Once I get the pattern bit done, I'll share it with you and my reasons for doing this particular pattern.  
 

November 23, 2010

Monmouth Cap

I needed a winter toque.  Someplace in the move over a year ago, I lost my toque and despite a whole year of looking, okay not looking really hard, I still have no idea where the winter toques and extra mitts were packed.  I've replaced the scarves and most of the mitts, but decided I needed to knit a new toque for myself.   I was hard pressed to find a pattern that wasn't too fluffy or complicated.   At the Ealdormere Kingdom Arts and Science competition, Jane had knit a very cute pair of Scoggers, or arm warmers based on a find from the Mary Rose.   This inspired me to look at Tudor cap finds. 

The Monmouth cap was known by name in the mid 16th century, but probably dates back to the 15th century.  The cap, first knit in Monmouth, Wales, became a staple clothing item for middle class English, workers, sailors and soldiers alike.  One existing cap is made of rough, two plied yarn, with only 59 stitches for a 22 inch circumference.   

I wasn't going to use rough yarn because I'm still in the midst of spinning for the hood project and my spinning wheels are in use.  I don't spin yarn that thick on a regular basis.   I have loads of yarn around but nothing in that grist.   I dug out the walnut dyed yarn from earlier this fall.  The pictures I looked at, show the hats features fairly clearly and written descriptions are quite detailed as well.   Some have a button on top, some don't.  They seem to be fulled and have a hanging loop at the bottom.  They have a doubled brim and fit quite closely.   So, I knitted up a swatch and figured out what gauge I'd need and went from there.  It seems to be a fairly straight forward project.

The Pattern:

Materials - Paton's Classic Wool - 1 skein
Needles - 1 set double points, 1 circular needle..  I think it's in 4.5 mm but the needles are ancient or scrounged and I've no idea for certain.  I'll edit the size when I actually get a needle gauge and know for sure.
Gauge- 5 stitches per inch  ( more important info than needles anyway!)

skills needed - cast on, stockinette stitch, purl stitch, pick up stitch, knit 2 together

Cast on 100 stitches. 
Place marker before first stitch and carefully join without twisting.
  Knit for 2.25 inches. 
Purl one row.
Knit for 2.25 inches.

This is the brim.  The row of purl stitches makes a convenient fold.  Fold brim up to the inside of hat.
Matching row for row, pick up one stitch from the bottom edge (now folded) and knit together with the working stitch of the same row.  Work the entire hat brim this way, catching each row  to the hat body.  This creates a finished edge and no need to sew the brim to the hat later.   Keep track of the marker for the start.

Knit until hat measures 5.5 inches from purled edge.

Start decreases...
Knit 8, knit 2 together - repeat for entire row
knit
knit
knit 7, knit 2 together - repeat for entire row
knit
knit
knit 6, knit 2 together - repeat for entire row
knit
knit
knit 5, knit 2 together - repeat for entire row
knit
knit 4, knit 2 together - repeat for entire row
knit
knit 3, knit 2 together - repeat for entire row
knit
knit 2, knit 2 together - repeat for entire row
knit
knit 1, knit 2 together - repeat for entire row
knit
knit 2 together - should be 10 stitches on needles
knit
cut yarn, leaving a 15 inch tail.   Thread yarn through 10 stitches and tie off, weaving in the tail
weave in the tail at the inside brim.

ta da... done..

November 19, 2010

Skeined, Labelled and Warped ... woo hoo

The sock yarn is all skeined up and ready to go.  I've labelled it as well, so all I have to do is to remember to pop it in my bag when I'm heading out to work at the Guild sale tomorrow.   I'm really happy with all the results.  Even the hank of yarn that I was only somewhat happy with, looks really good when in a proper sized skein!   

Notice that the skeins of yarn are setting nicely on warp threads?  Yes, I know I shouldn't set them there, but it was where the light was best on this dark, gloomy, autumn day.   And yes, they are indeed warp threads!  Handspun singles, all nicely sleyed and threaded through the heddles, checked for errors and test weaving done!   Yes, indeed, I am ready to start weaving the hood project.   As much as this has been an intriguing project, it has taken a long time, with too many interruptions.  I will be happy when it is woven off and I can put something fun and colourful on the loom.

November 16, 2010

Dyeing Sock Yarn


I've finished the pink socks!  They are bright to say the least.  I'm quite happy with them.  Those socks will be the perfect accessory for a miserable, grey, stormy winter day.  Taking pictures of one's own sock clad feet is still an art I need to perfect.

I've dyed up 500 grams of sock yarn, using weak acid dyes.  This is enough for 5 pairs of socks.   I'll be selling these at our Weaver and Spinner's Guild sale this weekend.   I'm thrilled with the results of 4 of the skeins but the 5th is just okay.  Here are the first 3 wound into skeins and ready to be labelled.   These are all ones I really like.   The one wound into 2 smaller skeins one I'm not sure I want to sell.    If only I'd written down the colours I'd used....  Honestly, it's not quite as bright as this but I forgot to take the camera off the vivid colour setting that I'd been playing around with.

There are two more really long skeins, waiting to be wound into regular skeins.  Tomorrow I'm hoping to dye up some roving to sell as well.   I had to run into town today to pick up a new scale as mine has decided to bite the dust.  Considering it was about 10 years old and a well used little kitchen scale, I don't feel too badly about it's foray into retirement.  I'm thrilled that my new little scale is simpler to use, seems more accurate and was less than half the price of my original one.   Now maybe I can get some soap made too.

November 10, 2010

Just a Quck Project

I've been soooo busy lately, that I had nothing really ready for waiting room projects.   Having to do just that, wait around for appointments, I decided to toss another pair of socks on the needles.  Socks are perfect waiting room projects because they don't take up much space and unless I'm doing a particularly complicated design or stitch combo, I don't need a paper pattern at all.

It had been grey and miserable out for days and I decided to knit up a bright pair of socks.  The only really obnoxiously bright yarn I had was a variegated pink and blue number I'd dyed last winter.   I had been going to try to sell it at the Oxford Weaver's Guild sale in a couple of weeks but decided I'd rather use it instead.  I started with just a plain ribbed pattern to test the yarn out and see how the colour variegations worked.   By the time 2 days of waiting around for appointments or meetings was done, I had too much on the needles to rip it out and start a new pattern, though I had one all ready to go.  Next pair, I guess.  

My friend Suzi convinced me that I should dye up a few skeins for the guild sale anyway.  She really liked the colours of this skein.   Results of those new skeins should be forthcoming rather soon since the sale is only one and a half weeks away.

New curtains in the livingroom have currently thwarted my heddle threading endeavours.   Once I move everything back in their rightful places, I'll be able to access the loom again.   A few days of glorious sunshine have made reorganizing furniture a less that glamourous and undesirable activity.  On the other hand,  hanging laundry, mulching the last of the fallen leaves and scrubbing the chooks water fountain, have  all been activities on the highly desirable list right now :)

November 03, 2010

On Comforts, Cuteness and Doneness

Comforts...

The wood is in for the winter.  We fetched - okay, that just seems wrong using fetch in the past tense - we picked up 20 cord of wood from our supplier, brought it home and stacked it.  It took a couple of weeks in total, although most of that was over the past few days.  People here are sore and achy from shifting and stacking.  However it's done and we're set for the winter.  


The garlic is planted.  It's late, I know.  It should have been in the garden 3 weeks ago, but one thing after another and I only really had the time to do it today.   At least it's in.  I mulched it with straw in hopes of protecting the new cloves at least a little bit.


I made these little bags yesterday.  Are they not one of the cutest things ever?   A gal at the spinning course had several she used to hold equipment.  I had to try them.  They're fully lined, not difficult to make and I'm all for the cuteness factor.  I'm going to use one to carry my current sock project in and another will be gift wrap for a small present.  


Done... socks for someone else...  They started out for me but were claimed by another whom I love enough to let that happen.  Yes, that means I need to start another sock project to put in the above cute little bag.

October 31, 2010

Colours of October

I'm quite sad that Sue had decided to end her Colours of the Month Challenge.  I've really enjoyed challenging myself to find interesting ways to show the colours of our seasons.   In the early years of photography, I had my own darkroom and took a lot of black and white photos.  I even did a bit of freelancing for a magazine.  It's been fun getting back into picture taking and I have to say, I love digital cameras.  I miss a bit of the surprise and control of the darkroom, but once I figure out how to process RAW, I'm sure I'll get that back as well.

Anyway, here are the colours of southern Ontario for October.

 This is the side yard.  It's been wet and we've not been able to get the leaves up as quickly this year.   When we get them, they are piled up in the gardens to compost over the winter.  If we get any appreciable amount of snow, they'll be gone by the spring.

  A Maple tree.  I don't know exactly what type of Maple.  For a few short days, when the sun hits it early in the morning, it seems to glow!  It's very pretty.


The last of the red Maple leaves in the garden.   Against the blue sky, the colours were perfect.


Milkweed with the seed pods opening.     A few of us had a grand time letting the little fluffy seed bits fly around while we played.  I'm only sorry that I didn't have the clippers with me.   While Milkweed is food for Monarch butterflies, it's also perennial.  I would have liked to have clipped the stalks to try to process for fibre while knowing the plant would grow back next year to feed the Monarchs.

A change in the weather patterns brought a few brief moments of a lovely pink sky.   It was very pretty.

October 30, 2010

Master Spinner 2

The Master Spinner 2 course is done.  Talk about exhausting!   It was 5 days long, which should have been just fine.  However it started on a Sunday and I'm not sure that any of us figured out which day of the week it was the whole time.  Monday - Friday would have been so much better I think.   We learned an awful lot and it was very intensive.  Level 3 is going to be offered in the spring time, so I'm going to have to buckle down and get my homework done in a timely fashion.   It's a huge project which is due after the course.  The instructor told me that level one was expected to take about 175 hours, so I'm guessing that level 2 is at least that much or more.  Certainly the project guidelines suggest it's a little more intensive homework than level 1.

Being offered by Olds College, they've redone the program to bring it up to the college's standards.  That means they have to include exams.  I enjoy research and projects.  I've totally forgotten how to write exams.  One more thing to catch up on.

All in all, it was fun and informative.  The instructor was a dear.  The participants/students are amazing, fun, funny and interesting.   A great group of people to learn with.   There were a few downsides - had to move locations, issues with supplies but many more highlights.   On our field trip we went to an experimental plot where they were growing Kenaf.  It's a tall plant in the hibiscus family which they were growing to experiment with biofuels.  However it has a stalk with two different properties: the outer is long flax like fibres while the inner core is much shorter and can be used in the paper industry.   I've a few stalks to play with.  This plant grew over 6 feet tall, so it will be interesting to see if I can get any usable fibre from it.

October 21, 2010

The Saxon Hood Project continues

I'm still winding the warp.  Sigh..   It's been busy around here and I've been in a bit of a panic because I need to make 15 savoury pies for Saturday.  I decided to make them fresh.  They'll taste much better that way, plus I absolutely do not have freezer space for 15 pies right now.   The course - level 2 starts on Sunday, so I'm trying to pack for that as well. 

So the warp winding is going slowly.   I'm half way through the S twist threads right now.    I wound off all the Z twist threads and sleyed the reed, leaving spaces for the S twist threads.   I'm sleying the S twist threads as I wind off each bundle of warp threads.   At slightly over 700 threads, I think threading the heddles will be a long job.   I wonder how many Star Trek movies I have handy to watch or rather listen to while I thread heddles?

There is enough yardage for 2 hoods.   One will be warped  Z,S alternating every 10 threads  and the weft will be Z, S alternating every 10 threads in a broken chevron twill or herringbone.   The second will use the same warp but I may do the whole weft as Z twist.  Both arrangements of Z and S twist yarns have been found.  I haven't decided for certain on the second yet, but it might be interesting to see the difference.  

At anyrate, I was trying to figure out how to keep my Z and S warp threads identified while weaving.  I have 2 boat shuttles but they are the exact same.   If I were to make a treadling error or start to day dream while weaving and lose conscious track of what I was doing - sometimes the hands and feet just keep going and when I wake up, it's like OMG - where am I in the pattern.. most disconcerting, or if someone should talk at me while I'm weaving, I'd not easily be able to tell the threads apart.  In reality, the only difference between the two threads is the twist and not discernibly different unless using a magnifier.

Top shuttle is a Leclerc, bottom one is the new Walnut shuttle
When visiting a friend, the one with the woodworker husband, I saw handmade shuttles sitting on the table.  Handmade boat shuttles in pretty, pretty woods.   There were 3 or 4 different ones and a couple I liked a little better than this beauty but I felt they were a tad too similar for me to tell them apart while I'm not paying attention.  This walnut one will be easy to keep track of.   It uses these very cool earth magnets to hold down the bobbin rod.  I can't wait to try it! 

Just before I left he handed me one of the new items he just made; shawl pins.  It's lovely.  He finishes his wood so nicely.   You just want to keep petting it, it's so soft and smooth.


October 16, 2010

It all started with a simple question..

I asked my sweetie if he'd mind if I painted over the icky bathroom wallpaper as a quick fix.   It was completely covered in wallpaper from the late 80's.   I wasn't able to wash it because it was paper, not vinyl and it was filthy.   I was tired of the nasty peach and off white which looked dark, drab and dirty.   I did check to see that indeed, you could paint over wallpaper by first coating it with a decent primer. 

But no, my sweetie said he'd just strip the wallpaper off and then we could paint.  Then he decided that we could get rid of the nasty peel and stick tiles because the room was small enough for vinyl flooring remnants which are usually available inexpensively.   More work than I'd anticipated, but still not an awful lot.   Then I mentioned that I'd paint the ugly plywood vanity as well.  It was painted in that awful off-white paint and no longer came clean.  I guess that happens when your paint is 20 years old.  The vanity counter top seeped dirt and didn't quite fit the bottom part, so my sweetie figured we should just change it out too.  And so the discussion went....   Just so you know, this particular redo wasn't in the works for a couple of years since it was useable, just ugly and nasty.

 Then came the actual work part.   The wallpaper was stuck to wallpaper which was stuck directly to the drywall.   We couldn't even get the wallpaper off by steaming it.  It was a horrible job,  beyond words.  Why would anyone not put a basecoat of something on fresh drywall?   We couldn't find an affordable piece of flooring in town and weren't going into the city so ended up with ceramic tile, which at least is fairly easy to install.

  I wasn't fast enough to get a full before picture.  This one is missing the different wallpaper print on the bottom half and the little border separating the two of them.  I've been told that the old cupboards were better built than anything you can get nowadays, but the drawer fronts were starting to wiggle off amongst other problems with it.  Cheap plywood is still cheap plywood whether it is new or old.. not better I think.


 It still needs decorating and a punch of colour, plus some details like towel bars added and some towel storage etc,  but to all extents and purposes, it's finally done.   It's brighter now.  It is easier to clean and I think it looks much better.

October 14, 2010

Project Updates

The winding of the warp has begun!   I've all the Z twist wound and the reed sleyed.   The S twist is taking it's turn on the warping board and when it's all wound, I'll sley it in the spaces.   I recalculated my set so am going with 24 rather than 21.  This means using more warp threads but I think the effect will be worth it.  It's easier to sley at anyrate, especially using two different threads that you can't tell apart!

I will definitely need to card more batts and start spinning more weft or I'll have a dressed loom and nothing to weave with.  


I took sewing break.  I'd found a pattern which I though would look good in handwoven yardage but decided to do a sample up first using polar fleece and use it as a mucking around jacket.   It took me a while to find the polar fleece.  The one fabric store prices were way more than I really wanted to pay and they only had kids prints.  The other had several acceptable prints but nothing suitable to line it with, in that I wanted to line it with fleece as well.   After hunting around the second store, I found that they indeed did have something I could use, but the store is new and laid out in an interesting but somewhat non-intuitive way.  In the end, I got sherpa fleece - almost a fake fur sheepskin for the lining.  Much heavier than I first wanted but it looked nice with the plaid.   The jacket was easy to sew up. Next time I'd make the sleeves shorter.  Matching the plaid took an extra 1/2 yard but was easy to do and sure makes a difference.   It still needs buttons and button holes.  I'm sure glad that I took the store clerks advice on getting a size smaller than I had chosen.   The amount of design ease is quite large.  If I had made it with high end, expensive drapey fabrics, it would have been fine, but as it is, it's a boxy jacket which should be just dandy for the winter.

October 09, 2010

Oh Noes!!!!!!!!!

I've knit new socks and I can't find them 'cause they're camouflaged.   Hehehe....  

Early last spring, I found a bin of On Your Toes Sock yarn on sale for a really good price.  I was hunting for a solid colour - any solid colour, just not bright self striping yarn.    There wasn't a single solid colour in the bin, but since the price was good, my sweetie grabbed a particular ball of yarn he'd noticed and pointed out that it was mainly black with only a little green and that perhaps darkish would be a nice change.   I didn't look too quickly but it seemed like it would be okay, so I headed to the check out.     Later when I went to knit it up, I found that no pattern at all looked good in what I now realized was camouflage print yarn!   I tried basket weave patterns, ribbing and even a lace pattern.   So, I finally just put a plain stockinette sock on the needles.  Even better is that they stitch up so quickly, that while I didn't really enjoy knitting this colourway, I enjoyed how quickly they popped off the needles.  

   If I had had enough yarn, I'd have knit up a pair of camo socks for a certain 12 year old boy that I know who is really into camo prints these days.  Unfortunately he has humongous feet and I only had 100 grams of yarn!  The upside of these socks is that they are super comfortable and you can't go wrong with that!  My foot is fairly narrow, so I dropped down two needle sizes for the foot and it was absolutely perfect!

October 07, 2010

More blue and warp spinning....

I harvested more Dyer's Knotweed.   I used the same method as the last only this time I didn't add the 1/2 tsp of acetic acid to each jar.   While it was a good amount of pigment, I think the slight acidification of the water, makes a bit of a difference so I will continue to do so in the future.  I might have gotten the last skein a little bit darker if I'd added a bit more Thiox and re-reduced the vat.  However, I had evening plans so used the vat as is.  These are 100 gram skeins of Patons Classic Wool.   I was able to dye 500 grams of the wool in the end.

I have more leaves to harvest.  I covered the plants and in the end we didn't have frost, although it did get pretty close temperature wise.  I can do at least one more Dyer's Knotweed vat and probably two.  The plants are amazingly hardy.  They are still putting out fresh growth.  One area is flowering profusely.   I've brought in some of the flowers to see if I can get them to actually go to seed.

I've spun more thread to use as the warp of the hood project.  It's been sized and is outside drying.   I didn't feel like hunting down dowels or sticks to hang and weight it from.   There isn't any area convenient to do that here.  The other house had a tree branch perfectly placed from which to hang a stick laden with skeins.  Here however, all the trees are big and no rack handy at the moment.  I'll deal with the curly bits as I go.  I'll go back over my numbers shortly to see where I miscalculated the warp.  However, according to how many ends I got from the last batch, I should have enough now.    I'll spin the weft as I need it - one skein of each Z twist and S twist as is needed.  If I start now, I should be able to keep up with my weaving, since I'm not even finished winding the warp yet.

Once it's dry, I can start winding warp again.   I'll do all the Z twist threads first.  Then I'll thread them into the reed front to back, as if I were doing a random stripe pattern, leaving spaces between the Z twists for the rest of the ends.  Then I'll wind the S twist warp and fill in the spaces.  This should hopefully help keep the threads in the appropriate order.   In a couple of days, I'll show you the nifty plan to keep the Z and S twist weft threads easily identifiable for weaving.