Pages

August 31, 2015

Open Tart of Strawberry

Mrs. Beeton's Open Tart of Strawberry or any other kind of Preserve


Super simple and requires only 2 ingredients - pastry and jam


The recipe even has an illustration showing the type of tart pan which was recommended.   Totally not the one I used, but the modern tart pan was the only item close enough in my cupboard. 

The recipe calls for puff pastry scraps.  My puff pastry was in my freezer instead of with me at the Westfield bake oven, so I quickly mixed up a short crust to use instead.   The recipe also tells us to cut out some stars or leaves from scraps and bake them separately, to put on the finished pie.  These are easy to do.  After you've rolled and covered your pan, gather the scraps into a ball and re-roll them.  Use a cookie cutter or a knife to cut shapes.  Bake them for just 4 or 5 minutes, until cooked through and just starting to brown.   Any extras can be coated in cinnamon and sugar before baking, for a super yummy treat.

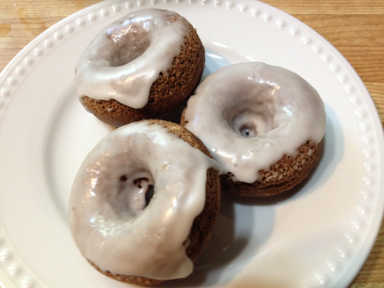
With the short crust pastry, I rolled out enough to cover the tart pan.  I used a fork to prick a lot of tiny holes in it about 1/2 inch apart. This is to keep the pastry flat.  The bake oven was fairly hot, about 400° F.  It took about 10 minutes to bake to a lovely shade of brown.  When it was cool, I spread on some Raspberry Jelly.    I used the little leaves to decorate the tart. 

Not only is this a pretty tart, but it was really delicious.

Mrs Beeton's Book of Household Management - 1856

Open Tart of Strawberry or any other kind of preserve.

Ingredients – Trimmings of puff-paste, any kind of jam


Mode – butter a tart-pan of the shape shown in the engraving; roll out the paste to the thickness of 1/2 an inch, and line the pan with it; prick a few holes at the bottom with a fork, and bake the tart in a brisk over from 10 – 15 minutes. Let the paste cool a little; then fill it with preserve, place a few stars or leaves on it, which have bee previously cut out of the paste and baked, and the tart is ready for table. By making it in this manner, both the flavour and the colour of the jam are preserved, which would otherwise be lost, were it baked in the oven on the paste; and besides, so much jam is not required.

10 to 15 minutes
Seasonable at any time


August 16, 2015

Bags, Sweaters and Cookery

The Oxford Weavers and Spinners have a meeting place full of looms, which are able to be used for both individual projects or guild group projects.   This little boho bag is one of the group projects.   A loom is warped up and ready to go, with multiple projects.  You can come in and weave off a project or two at your own pace.   I was lucky in that there was nobody ahead of me in the queue.  So I popped into the guild one morning and wove this off.   If I hadn't had to unweave the pattern bit, which I did in the wrong colour the first time, I would have been done in an hour.   As it was it took 1 hr, 20 min. and that included a bit of chatty time with another member.   It took much longer to assemble it and sew on the strap.


The Guild is offering a class in making these bags at the Woodstock Fleece Festival in October.  No experience needed as there are two different projects aimed at different experience levels.

I've had to do a bunch of waiting around lately.  Instead of a sock project, I decided to mix it up with a cardigan.  This is the Shaker Rib Cardigan from Boyfriend Sweaters.   It's an easy to knit pattern and perfect for sitting around waiting for appointments etc.   


I've wanted to go to Fort York for ages.  It always seems to be closed when we visit Toronto though.  This trip it was opened and we spent a couple of hours there.   While it is an interesting site, I found it a bit disappointing.   The only tours were on the hour and we missed it by 5 minutes.   The only people doing any interpreting were a small and very loosely rehearsed fife and drum group.  The drummers weren't bad but the fife players kept hitting wrong notes and had difficulties in keeping time.   The Georgian kitchen was closed.    Really, Old Fort Erie was a much more interesting and enjoyable tour.    However, the gift shop had a decent variety of cookery book facsimiles.   These four books came home with me.   It sort of made up for the disappointing afternoon.

August 09, 2015

Gluten Free Baked Donuts


These are my favourite quick baked treat. They mix up quickly with no fuss and they bake just as quickly.  They aren't really donuts, since they are baked and not fried, but are pretty close.  However, these are gluten free, dairy free and fairly low fat.  They mix up quickly and bake in just a few minutes, using a donut cake pan.   Because there is no oil in the batter, they will go stale a little more quickly.  Really though, how long will a batch of 12 small donuts last anyway?  They go so nicely with a big mug of tea.   nom, nom, nom

1 cup gluten free flour
1/2 tsp Xanthan gum
1/2 cup sugar
1/4 tsp salt
1/2 tsp nutmeg (freshly grated if possible)
1 tsp vanilla
2 eggs
1/3- 1/2 cup almond milk


Mix the dry ingredients in a bowl.  Stir well to blend the Xanthan gum.   Add the wet ingredients and stir to completely blend.  The mixture should be a little bit thick and not runny. Lightly oil the donut cake pan.    Scrape the batter into a large ziplock bag.  Squeeze out the air and close the bag.  Snip off a bottom corner of the bag and use as a piping bag to easily and neatly fill the donut indentations in the pan.   Bake at 350° for 7-10 minutes or until the little donuts spring back when lightly touched.

Let cool -

Glaze - 1 cup icing sugar, 1/2 tsp vanilla, 2 tbsn water or enough to make a fairly runny glaze.  Dip donuts, set on a cake rack to dry.   Put a piece of paper toweling or waxed paper under the rack to catch the drips for easy clean up.

Chocolate variation -  Use a scant cup flour and add 1 1/2 - 2 tbsn real cocoa powder.   I sift the cocoa in to get rid of the lumps.   Omit the vanilla.

To make them with real wheat flour  - omit the Xanthan gum and use all purpose flour in place of the gluten free flour.

August 04, 2015

Just bits and pieces

The bottom kitchen cupboards are all assembled.  We painted the interiors with the amazing paint, which brushes on streak free and gives are really hard, smooth surface.   Not so surprisingly, it is made for furniture and cabinets.  I did all the cutting in, you know, the corners and funky bits while my sweetie got to play with the cute little baby paint roller.  It didn't take long to paint the cupboards which will have shelves, but those drawer cupboards too forever.   Only the sink cupboard remains to be finished up and put in place.  I'm not sure we can do that until we know what we want to do for a counter.  As we had to go to a slightly smaller sink to fit in 2 corner cupboards, I am not sure we can actually install it until we have the new sink and the new counter.      The face fronts and doors are still to attach.  Most are cut and some are assembled.  I've been assured that it won't take long.   

I've knitted up some of the dyed yarn from the fibre reactive dye project in level 6 Master Spinner.   I only used 4 of the 5 skeins as the darkest colours really were very similar in intensity.  I had to knit the blue mitt twice though, as I was 3 stitches off for the body of the mitt.  It made enough of a difference in the fit, that I felt compelled to make it better.  I still have a gazillion ends to sew in though.  Those 3 missing stitches translated to about 24 inches of yarn which needed to be added for each colour.  That means almost twice as many ends to stitch in for the blue mitt than the red.

When Kevin was a little tiny kitten, he loved to play with the vacuum hose.  He would tumble over the hose, whether it was sitting there or in use.   Eventually he would tire and fall asleep wrapped around it.   We still have a hard time putting it away though, because it is one of his favourite places to sleep.  No matter where we try to hide it, he finds it and snuggles down for his naps.