Pages

Showing posts with label Costuming. Show all posts

February 12, 2022

project updates

I purchased a PDF pattern for a walking skirt.   Turns out it had 91 pages to print out and assemble.   While I ordered the pdf because it's an easy download, and I didn't want the hassle of shipping it, probably from the U.S, it turned out that it was 90 pages to print and assemble!   I've used pdf patterns before, but they were like 9 pages long, so easy to print at home.  

I bought this one on a Friday and had to wait until Monday, to go into town, to go to the print shop and get it printed out.   They did an amazing job, while I waited.  It probably took 10 minutes or so in total and cost $14.    It then took me two days to trim the pieces and glue them together.

I ordered the pattern because I'd drafted one myself from an 1895 pattern and one of the shapes didn't look right.   Turns out, I did just fine and my self drafted pattern was okay.  The only issue was I'd had to measure myself and need to make a couple of small changes because I wasn't quite accurate.

I purchased this yarn before Christmas and set it aside to gift to myself as we weren't going to really do presents this year.   However, I forgot about it and just found it.   I'm happy with it because it was merino superwash on sale for half price!  I wasn't sure about it in the skein, since it was a speckle pattern, but it's quite nice when knitted up.  It's also a nice yarn to work with.

  I did have to fiddle with the heel.  I tried the square heel or common heel again.   It is usually shown using a stockinette stitch flap.   However, once again, the plain stitch flap just swims on my foot, so I ripped it out and did my normal slip stitch flap.  With the square heel turn, it fits just fine now.

Wool singles.   I have two bobbins full and more roving.   It's from Upper Canada Village, and processed from their own sheep.  I lost the tag though, so I can't remember what kind of sheep it's from.  It's beautifully processed and easy to spin.   It's fairly coarse though, so I have no idea what I'll use it for.

April 29, 2019

Catching up with projects.

 I was doing a lot of spinning, trying to get yarn made for the hooked rug.   But then I started teaching a 3 week class on Beginner Spinning, so needed to empty my wheels for the last class when we'll be trying to learn the basics of the spinning wheel.   So all my wheels are empty right now.  Now to empty the bobbins.

I also realized I needed to get my 1830's dress remade.  The sleeves were heavy and one of them snagged on something and has a tear in it.   As well, the bodice wasn't all that comfortable.  I had an extra yard of fabric leftover, and I'd found another 2  yards or so on the discount,end of bolt shelf.  I recut the bodice and the sleeves.   The bodice is much better fitting now although the sleeves are okay, I'm going to recut them.  I miscalculated when making them a little less pouffy and ended up making them just a tad too small in the length.  Luckily I have enough fabric to re-do them.  I thought I'd had them cut on the opposite bias but obviously didn't, so I'll also try that one again.

I did a few things right though, like getting the bodice cut just a bit more on the high waist and a better take on the neckline.  I used the skirt from the original dress.  I'd attached it on a waist band so it was simply a matter of unpicking 2 seams and sewing the skirt back on the new bodice.

Phil and Dion were both excited when I pulled out the fabric, pattern and weights.   I had to actually walk away from cutting for a bit, for them to get their enthusiasm and curiosity out of the way before I could make any headway with the project.   I did this project properly, with a full muslin mock up of the bodice and took my time fitting it.  I did all the fiddly bits properly and even sewed on the hook and eye tape by hand to get it perfect.   It all added to the amount of time it took to make the dress, but was well worth it.  I still don't like fitting myself though.

I have 3 of these colourful scarves on the loom right now.    I have lots of the black but I'd like to find a skein or two of some of the other colours in the warp to make brighter, scarves.    There is lots of sparkle in this warp, which looks quite nice when woven up.   This is the scarf I played around with setts to find the best one.   I should just get down and weave them all off, but with the dress making session and FOOL stuff, I just haven't felt the love.  Part of it is that I don't really love making scarves either.   Lots of repetition, short throws of the shuttle and then you get to twist fringes afterwards..lol

Some pretty early spring flowers to cheer up the day.  It is another grey day here, damp and cool.   Most of the spring has been damp, grey, cool and windy.  There were a couple of days when it was warm enough to take the banjo outside and play on the deck.   I love doing that.


June 30, 2016

1830's Bonnet


I started this hat on Tuesday.  I wanted to see how the hat pattern worked and fitted so I used materials on hand, which meant some medium blue cotton velveteen and some darker blue broadcloth for the lining and trim.  I had the buckram base wired, assembled and mulled by Tuesday evening.   I should have finished it Wednesday, but the first fabric I tried for the lining was cotton gauze, which gathered beautifully and stretched so much it looked awful.  The second try, was the cotton gauze without the ruching, which looked worse!  I did a quick sample up with the broadcloth and despite having to shorten the lining a bit due to lack of materials, I thought it looked much better, so kept it.

There are flowers for decoration, but I forgot to purchase some florist tape, to bind them together, so they will have to wait.

The pattern is the 1830's (version C)  from Lynn McMasters.     I used crown buckhram from Farthingales  .   I didn't have any millinery wire in the correct gauge, so I used some 16 g  wire  (aluminum?) from the hardware store.   It pretty much looks like the fencing wire we used on the farm, but that was probably galvanized steel.

The pattern pieces go together nicely.  The instructions bounce around through the 6 pages a bit, so once I realized that, I read them through a couple of times and marked which pages were the ones I needed.  The instructions said to use glue in a few places.  I was bound and determined not to use glue, but in the end, it made things a lot easier so I used the glue.   You can't tell on the hat. 

  The pattern fits a little small and the ties aren't really in a place to hold the hat on my head if it were a windy day, but those are both easy fixes.   All in all, I think the pattern is really well done and I would recommend her patterns to anyone who wanted to try their hand at hat making.   I am pleased that the hat went together fairly quickly and is going to be a useful, wearable sample.

Hopefully I will have something other than broadcloth for my lining next time, but I'll have to say that I'm not unhappy with the look of the finished product by any means.  It does need the floral spray though :(

Materials - Crown Buckram, 16g wire, bamboo quilt batting, bias tape, cotton velveteen, cotton broadcloth, thread, tacky glue, flowers for trim. 

I had to stop by the fabric store for the flowers today and a dress length of 1830's fabric came home with me as well.  Totally unplanned, but it jumped out at me on my way to the floral department.

October 28, 2014

Halloween Sewing

Way back in the summer, my daughter asked me to make her a Gryffindor House Hogwarts cloak for her Halloween costume.  She's always thought of these things much in advance and thankfully gave me lots of warning.  A couple of weeks ago, she asked me how it was coming along.  So of course, I sprang into action.  I figured it would take a couple of hours, but really, it took me the better part of a day and then some.  You know, because I had to draft out the pattern from a little diagram and had to make it durable and clothing like, instead of just a one use costume.  This Hogwarts cloak could be handed down to her grandkids, if she were to have any!

The sleeves had a funky design, that I would change a bit if I ever made a second one.  Here it is half finished.  Of course I don't have a photo of it finished, because I got the last hem stitch in 2 minutes before we had to leave to drop it off on Saturday!  She promised me a photo of her as Hermione though. 

Then I had to work on a project for myself.  A project for no reason other than I felt like it.  It's not like I'll be going anywhere for Halloween, nor is it likely that we'll even have a single kid knock at our door where we live.  We've had one in the past 5 years and that was several years ago.

This hat is made of felt.  I could only find cheap craft felt, so it's interlined, plus the brim is wired, twice, since the first time wasn't strong enough for my liking.  The fabric store had every colour and width of cotton bias tape, except for black in the size I wanted.  They had some sort of shiny, man-made fibre bias tape  in the right width, in black, which I used.  I had to slip stitch it down by hand, as it was pretty slippery.   It looks quite nice though.

The flowers are made from scraps of the hat felt, some very dark Blackwatch plaid ribbon (much darker than the photo), wire and

glass beads.   They were super easy to make, being a circle of felt, cut in a spiral, rewound and then glued on the bottoms.  I used a fabric glue for the flowers, but hand stitched everything on to the hat, because my glue gun died last year and I forgot to replace it.   It was at least 15 years old, so was likely about time.  But I won't get back into town before Friday, so hand sewing it was.

If I do this again, I think I'll try a funky purple or grey, with black design quilting cotton, with big tulle and silk or paper accordion pleated poofy flowers.  And I'll replace the glue gun, just for speed and simplicity. Or just maybe I'll weave the fabric first.......


June 14, 2014

Spinning and more spinning

 My friend Kai went visit her family in Japan.  She brought me back this lovely gift of fermented Japanese Indigo leaves and the chemicals with which to process the dye vat!  I'm so excited about this.  I'm researching the how's right now because I don't read Japanese and the terminology in the translation of the instructions is different that what I normally use, so there is a bit of a disconnect with procedure.  It will happen though and it will be lots of fun.  Plus of course there is the research part, which is fun in itself.
 Merino in a colour called Beansprout.  It's very pretty and was easy to spin.  There was supposed to be 4 oz of it, but I'm wondering if there really is.  While Kromski bobbins are supposed to hold 4 oz, I've always found it to be completely full or even sometimes just a tad over full to get the full amount on.  This is just not quite there in my mind.  I'll weigh it after it is plied.  Yes, I'm going to ply it from a centre pull ball, and no I won't get any pig tails happening, because I've found keeping the tension even is all you need to keep pigtails at bay from any plying method.


More spinning, this time a Merino/silk blend.   Apparently it's supposed to be super slippery and hard to spin.  I've found that it drafts nicely and spins easily.   It's so pretty too, with a lovely mix of brown colours and the white silk.... and soft... lusciously soft.

Demonstrating spinning at the local Renn Faire on the school day.   My kirtle is too large by several inches around.  If I'd assembled it with opera seams as I'd intended, it would be an easy adjustment.  I like to write a little list of assembly steps when I make a garment.  However, I missed ready that particular item on my list of instructions and sewed the bodice together by rote, so instead, I'll have to rip the bodice half apart to make the adjustment.   It's way too much work for right now.  

October 21, 2013

Fleece Festival and Finished Projects.

The Woodstock Fleece Festival has come and gone.  My guild puts together a booth, demos and offers a class every year.  This year, the class had a limit of 6, which was quickly filled and expanded to 18 spaces.  Phew, I was glad that I wasn't teaching that one, but rather was one of the demo crew for the day.  I sat at my wheel and spun for the entire morning, which is always fun. I enjoy answering questions about the technical aspects of how a wheel spins, how to actually spin and about spinning wheels in general.  This year I had lots of questions about the type of wheel I was spinning by a number of people who were interested in the Kromski brand.   Of course there is the inevitable shopping.  This year I pre-ordered most of what I wanted and allowed myself 1 or 2 impulse purchases, so kept the budget well in control.  The next day I realized I'd forgotten one of the impulse purchases that I'd wanted, so while I'm disappointed as missing this fall's issue of Jane Austen Knits, I don't mind having spent less money.

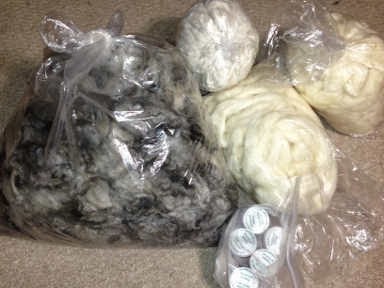
What I did get was a glorious Icelandic fleece from Willow Garden.  They had lovely fleeces and this
one seems to be fairly low in veg. matter and other contaminants and the varigated grey colour is spectacular.   The Tog or long coarser hair is very dark, almost black while the Thel or inner coat is so very soft and ranges from a light to medium grey.   It will be fun to work with, I'm certain of that.  There is also  Blue Faced Leicester sliver , some Merino/Cashmere blend rovings and some acid dyes.   Both cats decided that the Icelandic fleece was something to paw over and I had to hide it, at least until I get it washed up, nice and clean, not smelling quite so much of fresh sheep.

I finished up the chemise.  It was a quick project, only take a couple of hours to sew it up, including hand work.  It was really meant to be a wearable muslin so it wasn't made with expensive materials.  Good thing too as I don't really like it.   It misjudged the size so it's too large.  It's also too long, which if I liked wearing it and it fit, would be an easy fix.  Mainly, it has this weird, mandated by the pattern construction instructions, unfinished internal seam, which drove me buggy when sewing it up.  It's something that I've decided that I can't live with, so the chemise will become a nightgown and I'll find a better pattern.  No lace or tucks on the next chemise either.  It's just too much and unnecessary frou frou, for a garment meant to be used while working at the Bake oven.  


October 16, 2013

Victorian Undies and the coolest sewing tool

I've recently found myself in a position of needing new costume clothing as most of mine is now way too big.  As I'm working the Bake oven for 2 Sundays in a row upcoming and the weather is noticeably cooler, I decided to start with 1865ish stuff.   Since you need to build these costumes in layers, starting with the inside and working out, I am replacing all the Victorian undies first.

I drafted a new pattern for the drawers and while I was testing the pattern hoping to make a useable muslin, I kept the decoration fairly low key, I didn't want them completely plain.  Even if nobody else will see them, I wanting something I knew fit in with period style ornamentation.  I started these a week before a family member was schedule for surgery and I was pretty stressed.  However, the pattern came together flawlessly or so I thought, with the most even, spectacularly perfect tucks I'd ever made, which I then noticed were on the inside of the drawers.  I think it might have been faster to bin them and re-cut the pattern, but I didn't have enough fabric left.  So after tossing them in a corner for a couple of weeks, I went to pick out the stitches and found that my seam ripper didn't make it home from Fruits of Our Labours back in May.  Back in the corner they went until I could get a new seam ripper and dump the lethargy of a rapidly failing project to go at those tucks again.

The threads came out easily while the nicely pressed fold lines didn't disappear, making it a little more difficult to fold them the opposite way and resew them.   They aren't as perfect second time around, but they aren't too horrible and I can live with them as functional clothing.   The eyelet edging I had considered for the hems of the legs was all wrong.  All the extant samples I've seen use cotton laces.  While I have a significant amount of cotton lace in my stash, most of it is narrower, being bought for doll clothes and for what was really supposed to be a sample, and might not fit, I wasn't going to use the good stuff.   I did find a bit of flat cotton lace in a rumpled ball, which after a bit of a pressing, turned out to be not really expensive lace, but quite suitable.  I did have to pull a gimp thread - the thicker heading at the top to gather it. I used a machine heirloom sewing technique to sew it on.  I've used them a lot for doll clothes and other projects which don't take any stress or wear and tear.  I hope it has the strength to stand up to actual wearing.

The two tucks are functional tucks, meaning they are put in after the legs are sewn together and they can be let down if more length is needed in case for some reason I suddenly grow 2 inches taller or damage the bottom edge and need to length them to keep using them.
They are constructed with flat-felled seams and facings to reduce chafing possibilities.  I dragged them out to a guild meeting last night where I finished the hand stitching although they still need a button and button hole on the front waist band.

Today I drafted out a pattern for a new Victorian chemise and had the fun of using my pattern notcher.  I have a couple of cool tools but this one never fails to amuse me and make me happy.  It makes the sweetest, most perfect little notches in patterns which work so much better than any I've put in with just nipping with scissors.  It's a solid feeling little tool which works perfectly every time and is just fun to use.  I'll have to admit it was a gift and something I'd probably have never purchased for myself but definitely adds enjoyment and makes patterns look much more professional!


August 02, 2013

A quick sewing project

I needed a new apron for when I get to play with the Bake Oven , when I volunteer at the heritage village.  I've been borrowing one from the costume department but they are all a bit too large and a bit too frilly for me.  I'm short and some of the ruffly things are just too overwhelming to work in.  As well, they're all white, which is more of a fancy apron that a work apron for the time of 1865 - 70.   I decided to make one that actually fit me.

  Most work aprons that I've seen from that time period are pinner aprons, which use pins to hold up the bib, rather than a band or tie.  As well, work aprons really did tend to be colouful and patterned to hide the dirt.  I can say that when I work the oven, I get soot on my apron almost immediately, which shows up on the white most dramatically.  
The only fabric store left in town has a huge quilting department which does stock a few period reproduction prints.   While I wasn't in love with this pattern at first, the price was definitely right and the bolt markings designated it as 1863, which was pretty close to the time period I was after.  Pretty much everything else was later and a few were earlier.

It was pretty easy to sew up.  I marked and cut the pattern yesterday and sewed it together this afternoon.    I combined two different "patterns" for this project.  The first instructions were from The Sewing Academy,  from the section of free patterns.  The second was from World Turned Upside Down.  I do wish I'd gathered the bib a bit, but otherwise it's turned out quite nicely.  

The apron has buttons at the back, rather than ties.   I couldn't find my little piece of wood that I normally keep in my sewing box,  when I needed to cut the waistband button holes, so I took the apron out to the chopping block.  I found this little buttonhole chisel a while back and it cuts the cleanest buttonholes ever, way nicer than using snips or scissors.  It's one of those right tools for the job and makes a professional, very clean slice.


I put two patch pockets on the apron.  I've only seen a couple of that era aprons with large patch pockets, but there are a few.  It's the one thing that I find myself missing, so I added them.  I did match the patterns though, so they are more than  a bit discrete.  Here is the finished apron, pinned to the barn.  By the time I'd finished the apron, I loved the fabric and could have seen a dress made of this.  However I can't have a dress and an apron made of the same fabric, so I'll have to keep looking.

I purchased 3 yards of fabric but have 3/4 of a yard leftover, so I guess that means I've started collection reproduction fabrics for  a quilt! 


Rudbekia Goldsturm is one of my favourite flowers.  Despite it being yellow, it blooms for a very long time and at the end of the summer, when  a lot of the perennials have already had their 15 minutes of fame.  Sometimes I harvest it for dye plants, but it makes a rather soft, greenish colour and I do think it's value really is in the garden rather than the dye pot.

November 20, 2012

Black on Black, with black thread....

Update on the coat I'm making.  I found the fabric in storage, having bought it ages ago.  It's a 2/2 twill which I'm pretty sure came from an unlabelled sale rack.  I did a flame test and it self extinguished and turned to a fine ash, so I think it's probably a wool blend of some kind.  It sews up quite nicely.

Here is my effort at a welted pocket with a flap.  I've done one welted pocket before and this one turned out quite nicely.  They aren't actually difficult, just fussy.  I'm happy that the underside looks as nice as the outside.  The pattern didn't call for an upper welt, but I think if I had to do it over, I'd probably put one in, just because it isn't too much more work.    These pockets are large enough to be more than decorative.

 I sort of wish I'd been able to find a nice polished cotton or some other interesting fabric for the lining, at least all but the sleeves, but in the time I had, this regular old lining fabric was the best solution I could find.

 The peplum lining is mainly sewn in by hand.   It's slip stitched along the hemline and on the back opening.  On the back, the two sides are slip stitched together.  This is when I really love my old thimble that actually fits.  Black on black, with black thread is something I'd not put into the equation.  Good thing my sewing room has pretty decent lighting.
The jacket top only really needs a few things left to do.  I should go back inside and do a bit of support stitching.  The buttons and button holes need to be made and if I have time, I'll do a prick stitch from the underside of the lapels to give them a bit of stability.  The pattern doesn't call for it, nor does it call for top stitching but it looks a little unfinished without something .  Perhaps the weight of the peplum will give it a more polished look.

What's left to do?  First, slip stitching the other half of the peplum lining.  Then assemble the two halves.   Attach the peplum to the top.  Then it's make the button holes and sew on the buttons!    Before the coat can be worn though, it will need a very thorough dehairing from the shedding cats.

May 07, 2011

Projects here and there.

The new fencing doublet has been started.  I marked out and cut, a gazillion yards of continuous bias with which to make decorative piping.  I was lucky that I found some piping cord hidden away because none of the local stores carry piping cord suitable for clothing.  They only have jumbo, thick, massive cord for upholstery.  The gals working at the stores had no idea you could make your own piping and one of them thought it was a rather crazy, weird idea!  

Lots of spinning happening as well.  I finished up the tan and white Shetland roving.  It was a joy to spin as it drafted beautifully.  It's lovely and soft as well.   It is interesting how the lighting and camera settings affected this photo as the skeins are close to the same colour.  

Now I'm spinning white Shetland.  I am pretty sure it's Gwennie's fleece.  The fleece was incredibly greasy.  It lost over 2 lbs weight in processing.   It's lovely and crimpy and reasonably soft, though not as soft as I'd expected.   I learned in my master spinner course that often fibre beasts with a little bit of stress, outside a bit in the winter, etc, have finer fleeces than those which are not stressed at all.    This flock of sheep is the more about being pets than farm animals and it might show a bit in the fleeces.

I started some new socks.  I found this very pink sock yarn on sale.   It's soft and yummy sock yarn and was a very good price.  It's very pink.   It's like knitting up Valentine's Day into socks!  I normally run the pattern down the foot but I decided to keep it just on the leg.    I'm not keeping these ones though.   They're a gift that I'm quite thrilled to be starting with plenty of time to actually finish them.

April 27, 2011

Rambling Projects and Garden excitment..

It took one Stanley Cup playoff game to finish up the pink tunic.  It's been waiting around for an awfully long time to get hemmed.  The neckline needed a small modification and the Bayeux stitch animal cuffs were added.  It turned out quite nicely I think.   I wore it to a school demo and was quite pleased with the fit.

More Stanley Cup spinning took place as well.  The black skeins are Shetland and it's lovely, soft and clean fibre.   I really wanted to use a long draw but it just refused to cooperate, unless I reprocessed the rovings by hand, which wasn't happening.  Instead, spun it with a short draw.  It took much longer to spin but I'm very happy with the results.  I still have a few yards of  black roving to to spin.  It may be the end of the prepared roving for Stanley Cup spinning and  I may also have to card as well..   Hmm I guess that is what intermissions are for?

Garden excitement is also happening.  The tomato plants are looking quite nice.  The peppers are slowly growing.   Actually almost all of the seeds I started are in reasonable shape considering there is almost a month yet before they should be planted.   Except the parsley.  It's old seed.  It's also slow to germinate.  I may have to buy a plant this spring..  egads!  I don't think my sage plants made it through the winter either, so that's two plants on the needed list.

Tiny Indigo Tinctoria Seedlings
The indigo seeds I'd planted earlier have done nothing.   After doing a bit more research, it turns out that Indigo Tinctoria likes warmth as in 24C constant temperatures to germinate.  One suggestion is to put the pots on a heat mat.  It also helps to soak the seeds overnight.  We keep our house cool and I don't own a heat mat, so I soaked a paper towel, sprinkled a few Indigo seeds on it, folded it up and slipped it in a plastic sandwich bag.  I put the bag on the rack over the grow lights, so it would get some heat for at least part of the day.  A couple of days ago, there were a few spots in the paper towel. I opened it up to reveal some sprouted seeds.  I planted these in soil.  I really wasn't sure that any would survive, but so far of 8 seeds germinated, all 8 are still looking alive.   That spurred me on to plant some Madder, Dyer's Knotweed and some Chinese Woad as well.   All the seeds are last year's so we'll have to see how well they germinate.
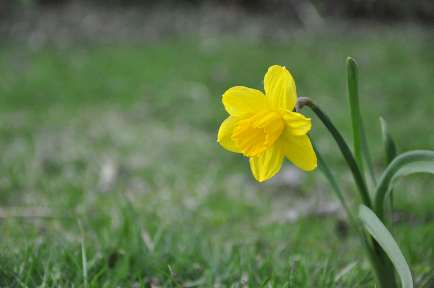
The first full sized daffodil of the season.  It's growing in the middle of the lawn, presumably planted their by our feisty grey squirrel.  You'd hardly know that we had a squirrel nearby at all except for an occasional rustle of branches.  I did see him at the bird feeder a few times this winter.  He was no skinny little runt of a squirrel!   However I'd have never thought to plant a daffodil in the middle of the yard.  It turns out to be a lovely place for it, so he can stay and eat the leftover bird seed.  After all, I'd see up to 20 crows there at once, so what difference could 1 squirrel make?

Oh yes, and somebody, please make it stop raining!

July 07, 2010

Sewing and Spinning and garden stuff

I'd started this shirt for my sweetie ages ago but didn't get past cutting it out and doing the blackwork. It didn't take long to sew it together, but the hand finishing on cuffs, collar and plackets did take a while. I had the wrist and neck ties all ready to go and managed to forget to sew them when I was assembling the shirt, so that still needs to be done. I'm not thrilled with the blackwork pattern. It's based on a 16th c pattern, but just didn't like the way it stitched out. Because of that, I only did the cuffs and collar. I had wanted to do a strip down the sleeves and on either side of the neck placket, but didn't like the pattern enough for that much work. Back to the drawing board I guess.

The Romney lamb fleece is almost done. I've a bag of short bits and stained bits left that aren't worth working with. The last two bobbins I plied together gave me a skein of 262 yds and last night I got the last salvageable locks carded into rolags. I need to do a dye vat -for one of the last homework assignments and for my final project, but it's been so hot here that I've not been certain that I wanted to hang out over a hot stove for an afternoon.

The garden loves this weather though! I hope we get some rain soon because I've had to do a bit of spot watering. The yellow zuchinni are starting to grow nicely and with any luck I'll have some to harvest in a few days. There are 2 other plants, so I daresay I'll have enough summer squash for fresh use, the freezer and most of my friends. The tomatoes are starting to set fruit and the beans are flowering! That means fresh beans in a few days.. yummy!

February 05, 2010

She thought she wasn't busy.... BUT.......

I really was.

Every year I take my Ashford traveller, give her a good wipe down and re-apply the tung oil finish. Turns out I should be doing it every 6 months, so this summer I will take some fine steel wool and sand her down before I apply the next coat. I can do it outside, which will be nicer. It took 3 days to do this but after a good cleaning, two coats of tung oil, oiling and waxing all the moving bits, she spins like new.

My sweetie calls her my forgotten wheel, but she is only a tad neglected sometimes, never forgotten. I'm spinning the Shetland Shawl project on her. Tammy provided the rovings and I'm spinning and weaving them into a shawl for her. The rovings are from some of her favourite sheep. I'm spinning the shawl project on the Traveller so I can drag the wheel and the project out to the Guild spin-ins. There are 3 a month and I've found them to be a really good way to set away a block of spinning time. Since this skein of 263 yards of plied shetland wool took most of my free time for two days, having a few blocks of time devoted to spinning this yarn is a going to help a lot in time management.

I finished spinning up the pink and purple polwarth rovings. I really hope that I have enough to weave with, but I'm not sure. There are only 500 gms of them. I was initially planning to make a woven vest with them but I might have to do the back of some sort of contrasting, commercial fabric as I'm not sure I'll have enough.

I broke down and started a few herb seeds. There were a few potted herbs in a local grocery store and they were very sad looking plants. I didn't think I could bring them back, they looked so far gone. Instead, I put a grow light and a few peat pellets in a tray and planted some Flat leaf Parsley, Chives and Sweet Basil. The parsley seems to be a bit of a slow grower, but the others are making me very happy. These will be for inside pots. It's really too early to start seedlings yet here.

That being said, I may try Winter Sowing some Weld and Dyer's Greenweed seeds. This is supposed to be a good way to start perennials. You plant them in a clear plastic lidded container and leave them outside to freeze and thaw as the weather conditions dictate. This stratifies if necessary and lets them start as soon as they can. It is supposed to give strong plants.


I made two Anglo Saxon style hoods - one from handwoven wool fabric dyed with Yellow Bedstraw. The other is just a plain commercially woven wool fabric. Both are lined with linen. They are for a Regia Anglorum N.A outing this weekend.

Right now, I'm mordanting yarn and cooking up some dried Weld for the Regia outing. It's outside and the weather looks good - sunny and -8C. I'm dragging out the dye pots, or at least the nice steel pot and I'm going to try dyeing over an open fire in February. I'm not sure I'm willing to risk the clay dye pot to temperature extremes for a winter demo.

January 21, 2010

Harvest socks and blackwork

The socks are finished! My son dubbed them the Harvest socks, because of their colours. They've washed up incredibly soft and yummy! Interesting colour, interesting texture, soft and warm.. what more could one ask for in a pair of socks? The home stretch of the last sock was an interesting voyage. I had to "tink" back the heel gusset ( tink is knit backwards.. hehehe) and redo it as I'd managed to include a near fatal error in picking up the gusset stitches. Then I had to redo the toe and tink it back twice until I realized that I couldn't watch Joss Wheden's Dollhouse series and count toe decreases at the same time. After putting it down, I redid the toe the next morning and voila - beautiful finished socks. I really like the look and simplicity of making "fraternal" socks. I really had only about 2 metres of yarn left in the skein after the first sock, so didn't want to waste yarn looking for the same starting point on the second one.

I'm finishing up spinning the wildly pink and purple rovings which should be destined for a woven vest. I can at least always spin while watching the telly, although normally I can knit as well.

I've also started a new outfit for my sweetie. I owe him several that have been backlogged over the past couple of years. A new early period outfit, two or three 16th c outfits; - sigh, I lost track exactly sometime last year when most of the materials and started projects got tossed into storage. One step at a time..... starting with a new shirt! With being able to set up the sewing machine and hook it up to the computer, I did some digitizing and stitched out the following blackwork for him to choose from. Right now his first choice and mine aren't the same, so I may have to do up a 4th sample for him. Even though I'm doing the blackwork by machine, it does take time for the designs to stitch out. You need to be attentive to the machine, the thread and once each pattern repeat stitches out, you need to reset the hoop for the next one. Each colour change has to be rethreaded as well... a definate upside to blackwork is the single colour.

SEEDS - the first seed order has arrived. I've always had spectacular service from Richter's and they shipped on Monday and the seeds arrived on Wed. I have most of the new herb garden and the dye garden seeds now. The dye garden will have a few new additions this year. Along with the Golden Marguerite, Weld, Madder, Woad, Yellow Bedstraw and Dyer's Greenweed - presuming the latter survives the winter after transplanting, there will be Elecampane, Black Hollyhocks, Coreopsis Tinctoria, Red Yarrow and Chinese Woad. I'm in the process of trying to procure some more Dyer's Knotweed seed this year as well. The having to start ALL over again and replant everything is going to be alot of work so hopefully there will be a bit of a harvest the first year to make up for that. I'm not exactly sure what Mr. Inspector Kitty find so interesting in the seed packets, but as soon as they are anywhere he can reach them, he's pawing at them, rolling on them and otherwise making his delight being known!