 I needed a new apron for when I get to play with the Bake Oven , when I volunteer at the heritage village. I've been borrowing one from the costume department but they are all a bit too large and a bit too frilly for me. I'm short and some of the ruffly things are just too overwhelming to work in. As well, they're all white, which is more of a fancy apron that a work apron for the time of 1865 - 70. I decided to make one that actually fit me.
Most work aprons that I've seen from that time period are pinner aprons, which use pins to hold up the bib, rather than a band or tie. As well, work aprons really did tend to be colouful and patterned to hide the dirt. I can say that when I work the oven, I get soot on my apron almost immediately, which shows up on the white most dramatically.
The only fabric store left in town has a huge quilting department which does stock a few period reproduction prints. While I wasn't in love with this pattern at first, the price was definitely right and the bolt markings designated it as 1863, which was pretty close to the time period I was after. Pretty much everything else was later and a few were earlier.
It was pretty easy to sew up. I marked and cut the pattern yesterday and sewed it together this afternoon. I combined two different "patterns" for this project. The first instructions were from The Sewing Academy, from the section of free patterns. The second was from World Turned Upside Down. I do wish I'd gathered the bib a bit, but otherwise it's turned out quite nicely.
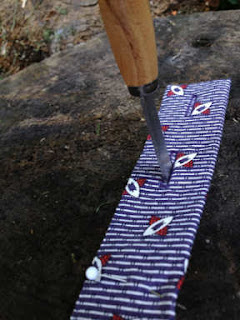
The apron has buttons at the back, rather than ties. I couldn't find my little piece of wood that I normally keep in my sewing box, when I needed to cut the waistband button holes, so I took the apron out to the chopping block. I found this little buttonhole chisel a while back and it cuts the cleanest buttonholes ever, way nicer than using snips or scissors. It's one of those right tools for the job and makes a professional, very clean slice.

I put two patch pockets on the apron. I've only seen a couple of that era aprons with large patch pockets, but there are a few. It's the one thing that I find myself missing, so I added them. I did match the patterns though, so they are more than a bit discrete. Here is the finished apron, pinned to the barn. By the time I'd finished the apron, I loved the fabric and could have seen a dress made of this. However I can't have a dress and an apron made of the same fabric, so I'll have to keep looking.
I purchased 3 yards of fabric but have 3/4 of a yard leftover, so I guess that means I've started collection reproduction fabrics for a quilt!
Rudbekia Goldsturm is one of my favourite flowers. Despite it being yellow, it blooms for a very long time and at the end of the summer, when a lot of the perennials have already had their 15 minutes of fame. Sometimes I harvest it for dye plants, but it makes a rather soft, greenish colour and I do think it's value really is in the garden rather than the dye pot.


funny, how different the pattern on the fabric looks in a close-up! I am not an apron fan, but one without pockets would be even worse for me - where to stuff things in between? and I have a rudbeckia, too (haven't tried it for dyeing), but I cannot even see flower buds - yet!
ReplyDelete