Pages

Showing posts with label weave structures. Show all posts

February 05, 2021

New Tea Towels - Kevin update

 I finally cut off the scarf project that I hated, wound a warp of 2/8 cotton for tea towels and dressed the loom, in quick order.  The pink and green warp had 2 colours I wasn't fond of, the greens, plus the pinks aren't colour I often use, for weaving at least.   I had grabbed a cone of the pale pink and challenged myself to build a tea towel project around it.  This colour combination felt very spring time to me.


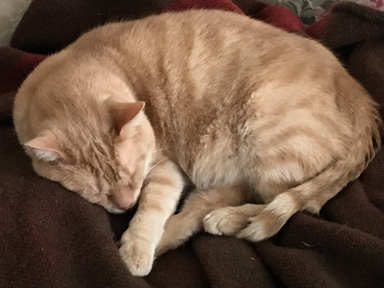
Kevin liked the towels!  We've had a few sunny days and he would situate himself on the loom to enjoy the sun streaming inside.   Usually he just sits on the front beam, but this time he kept sitting on the towels as well.  Luckily, it didn't affect the tension of the project, although it did cut into my weaving time.  I realize I could have just shooed him off, but he doesn't get a sunny spot to himself too often.  Usually one of the ginger kitties bumps him away, so I let him enjoy his moments in the sun.


I planned the project for 4 towels.   I used 2/8 unmercerized cotton, sett 18, tabby weave.   I used only a single colour for the weft, but I rotated through the 4 main colours I'd used for the warp.  These towels flew off the loom.  Please note, there are 5 towels shown.  That is because I had so much loom waste left, I wove off another towel.  I had enough left for a napkin as well, however because I'm going to tie on another towel, with the same details and pattern, but in blues, I left the extra warp length to make tying on easier.

I stitched between each towel, on both sides of the dividing marker and at each end of the length of towels.  Interestingly, there was virtually no shrinkage off the loom.   They are 18 inches wide by 32 inches long before hemming and wet finishing. I've tossed them in the washing machine and will then machine dry them before hemming, which I will do by machine.

 I played around a bit with different warp tensions while weaving.  I learned a fair bit.   I did this because we have a jack loom in the Guild studio that people have complained about being really difficult to treadle.   A couple of us have had no issues with this though and I figured out that for that loom, if you ratchet up the warp tension too high, you can't easily lift the shafts and get a really small  shed.    With my counterbalance loom, the same issue happens but to a much lesser extent.  However, if you don't get the warp tight enough, the bottom threads in the open shed are too loose and skipped threads both upper and lower, happen more often.   I found tension more of a personal preference with the counter balance loom.  However, with the jack loom, tension definitely affects usability.


September 21, 2020

Colours of September


 I dressed the loom with the Kool-aid dyed warp using the Wall of Troy pattern from Margarite Davison's green book.  It's a fairly striking pattern but still an easy pattern to both thread and weave.   I'm done the first scarf and there is another left to weave.   Progress has been interrupted by helping my son-in-law build garage doors, canning, teaching a socially distanced rug hooking class at the park, hydro issues which mean the whole electrical panel needs to be replaced and a scary and irritating trip to the car dealer for a simple service on my cute little car, where they made all the motions of masking and social distancing, except for the part where they actually did it.  

The new hens have settled in nicely.  It only took them a couple of days to fully integrate.   After months of waiting for new birds, the feed store was able to get ready to lay hens delivered two weeks in a row.   Yay, to him finding independent breeders to supply us with hens!

 These ones are laying little pullet eggs.  Pullets are young layers.  They should start off laying tiny eggs like these, and gradually their eggs should increase in size.   Sadly, some of the hybrids we've had start off laying huge eggs and it can't be healthy for them.

I found prune plums in the stores, although not at the market. They were wonderfully ripe and two containers came home with me.   They make a wonderful jam or preserve.  I didn't chop them up, so my jam has chunks of peel and fruit in it.  Normally I chop the plum halves up a bit, and then the skins seem to just dissolve completely.  Still, the jam this year is pretty awesome.  It finished to a deep reddish purple colour, from the skins.  It's so pretty.

I dragged out the blending board.  I played with some colours of commercial corriedale.   They're not quite felted and they look fine, but they were just not quite easy enough to pull off the rolags, so slightly compacted perhaps, from sitting in a drawer for however long it's been.  Still it was fun to do.  


Blogger has been switched over to the new version, which I didn't want to use whenver they first introduced it.  I liked the old Blogger format and it was easy to use.  Now I'm finding a new learning curve and having to figure out new glitches.  It doesn't seem as easy to drop photos where I want them amongst a few other things I need to figure out.   This means that my layouts and formatting may be a little off until I muddle through it all.  I'm sure it will all come together at some point.


March 13, 2019

Doubleweave and signs of spring

 This warp was threaded pretty easily.  I'm not sure why, but I designed the stripe based on the finished width of the fabric in inches, and didn't take the thread count into consideration.   IN order to make it work, I had to add a few threads, so it's wider than I had planned, which isn't a bad thing for a blanket.
It's slow weaving though.   I much prefer the Finnish Toika temple.   I think it is easier to use.   The little spiky points at the end are easier to set into the fabric and it's thinner so you can see the fabric while you're weaving.  I'm having to be very careful because the spikes often miss the second layer and the width hides skipped threads until I am almost a whole block up.  Because it's double weave, it takes 4 shots of the shuttle to show 2 shots on the top layer, so it's double the unweaving to correct a mistake..   Egads!  Sometimes it seems like it has been 2 steps forward and 2 steps back.
The sap is running and buckets are up!  Yay!  That is a sure sign that spring is on the way.

March 05, 2019

More Double Weave.

 I'm making another double weave blanket.  Not only did I really enjoy making the last one, but I decided I want to learn more about double weave.   Working on making double wide fabric competently is my next step.   Another blanket is the project because a) I have the materials on hand and b) I've hardly gotten to use the blanket I just made.   It seems it is currently a favourite cuddle spot.

I'm sure that once the latest stupid cold weather passes, the cats' interest will also pass, but then I won't need it either!
Dion uses the blnaket the most.  I find him on it at least once a day, usually more often.


Mu, or Cat as we call him because for a long time he was our only cat, also loves this blanket.  He's old though, about 16 and too skinny, so it probably keeps him warm.
Dion again.   One day I found 3 cats curled up on this blanket.  It is certifiably kitty approved.

 The new blanket is planned to be 26 in wide on the loom.  It is 2 colours, with 2 in. alternating blocks in a checky pattern.   If I'm going to learn about the weave structure, I thought it was good to do a pattern requiring  a little more effort than the first one.     The yarn is wool I had on hand, purchased for another project which never made it up in the project queue.  I'm using the same threading as last time, although I didn't tie this project on as it's planned to be wider than the first blanket.

March 01, 2019

Double Weave blanket

The double weave wool  blanket is off the loom.    I wove it to about 87 inches long.  My plan was 85inches but there I did a couple of inches more just because length wasn't so much of an issue.   It came off the loom at about 82 long and 44 wide.   Because of the learning curve with the temple, there was a bit of packing in the centre line where the two sides attached.  I easily pulled out 2 threads from the centre which gave enough space for the rest of the threads to spread out.  Because it was tabby weave, I had to pull out 2 threads to make sure the weave structure was continuous.


I probably should have left enough for fringes, but I have discovered that I don't like blankets which have fringes.  They tickle my neck and face, and arms and wherever else those fringes end up.  I find it most annoying.  However, I just ran the ends through my sewing machine with a zig zag stitch,  cut the ends about 1 inch from that and put the blanket in the washer for wet finishing.   I also put in a pair of jeans and a couple of other items to balance the load.

I used warm water -  I only use warm for finishing fabrics.   I set it for the normal cycle, but only for a short agitation time.  I checked it a couple of times and ended up letting it run the whole cycle.   I pulled it out and still wasn't happy with the fulling -  I wanted it fairly dense so I could do some embroidery on the red band.   I shortened the time cycle and ran it through the washer again.   This time though, I got distracted by loading the woodstoves and by the time I returned to the washer, it was the spin cycle.   

So yes, it did full just a little more than I wanted.  I lost 10 inches in length and 4 inches in width..  I've tried embroidering on it and it's just a little more fuzzy and dense than I'd prefer for that.  On the plus side, it's fuzzy and almost soft.  It is amazingly warm.  At one point there were 3 cats cuddled up on it and no room for me.   

I hemmed it after it was fulled.  I used the thrums to hem it, so the yarns match.  In hindsight, I probably should have hemmed it before I fulled it instead of after so that the hemming threads would full as well and become virtually invisible.  They aren't easy to see as it is, but in a perfect world......

From a distance, it looks a greeny-brown with a red stripe.  It isn't until you are up close that you can see the different coloured weft and warp.   The colour variations in these photos aren't noticeable by most people.  Nobody has commented on it as of yet.     It was really difficult to get a good colour representation.  The middle photo is closest but it's still too bright.

This was a fun project.   Once I started weaving, double weave made so much sense.  It was ridiculously easy.  I had a few skipped threads on top, and only one on the bottom.  There were no threads attaching the two layers in the wrong places.   The temple made the selvedges easy, once I figured it out.    Anyway, I'm super happy with this blanket.   Super, Super Happy!

February 23, 2019

Double Weave and New Shoes!

I'm finally weaving.  It's been slow going though.   First, I had the worst time threading the single stripe which is on the bottom layer.   I ended up rethreading it 5 times.   Then, when I thought I was good to go, Phil, my sweet orange kitty helper, wouldn't be persuaded to leave the loom alone.   In the end, I re-threaded ALL the heddles and re-sleyed the whole thing.  I very quickly tied everything on so that no more kitty helping could interfere!

Then I waffled about warp colours.  Originally I was going to do the red, so as to have a solid red stripe.   After sampling, I then thought that the red was a little to bright, so was going to switch out for green.  However after checking out my supplies, I didn't have enough green, so I went back to the red.  Now, seeing how much red I've actually used, I probably did have enough green.   I don't really like playing yarn chicken with my projects though, so I'm happy enough with the colour choices.

Then, the 1st treadle in my pattern, started getting caught in the loops of the treadle beside it.  Since it was an unused treadle, I pulled out the pin holding the cords and set it on the ground the way we do with some beginner classes.   Next, the first shaft kept unhooking from the lam.   Then once in a while the second one would unhook.  Talk about a nuisance.   I had to crawl under the loom, re-attach the hook and then unweave what ever few rows I had done because there was invariably a skipped thread.    Finally the brake spring slipped off.   How does that even happen?  The result of that was having to wait for someone stronger than myself to hook it back up.     ARGH! 

So far I've been pretty thrilled that I can slip my hand between both layers and thus working like it's intended to work.   I've also been using a temple.   I'm actually enjoying it.   There is definitely a learning curve for selvedges, but even if the only benefit is that there is less abrasion on the outer threads I think it is worth it.

New shoes!  Runners are almost as good as new boots, almost but not quite.  Still, they are comfortable, although maybe a bit bright.   They were on sale but of course the blue ones were already sold out in my size.    They are very spring-like and are happy coloured shoes.

Soon I'll have a picture of my seedlings.  Japanese Indigo seeds have sprouted.  They were a bit unevenly timed as some seemed to start right away while other seeds took their sweet time.  I ended up soaking some seeds overnight which helped a lot.  I also planted 4 white cotton seeds.  I think I have some green ones around as well.  If I can find them, I will try to start them also.  The green cotton seeds are a few years old though so might not still be viable.   Still, things growing always makes me happy!

February 13, 2019

Off and On the Loom

Done and done!  The sparkly scarves are off the loom.   They look pretty good if I do say so myself.   I'm happy with them.   I measured up the second similar warp I'd wound; the one that I'd thought I'd made a mistake on.   It turns out that I did indeed wind the whole warp incorrectly.   I had intended to tie it on to the warp still on the loom.   I didn't feel like rewinding it right then.  What a mess that would be - putting it back on the warping board, skeining it up and then winding a new warp.   So, instead, I set it aside, cut off the remaining warp and started putting the blanket/cloak warp on. 

That one is the green warp which I'd tried to dye brown, but only managed to get a splotchy darker green.  It's actually a nice colour green and I can live with the splotches.   The project is using double weave.  That means dressing the loom with 2 layers at once, and in this case, attaching them at one side.  I'm using the left side since that is where I get my best selvedges.   If I can find some fishing line, I'll run a heavily weighted floating selvedge on the left side, to help minimize the draw in where the two layers join.

I put in a single stripe along one side.   I did make the mistake of winding it with the skein of green, when I'd already wound and dyed that bit of green.  So I pulled out the undyed green and have added in the dyed bit.  I got it right since the added in green bit matched numbers exactly with the red.    It will be a bit of a pain to pull the undyed green out the rest of the way, but if I do it slowly and as I go, it shouldn't be too much of an issue.

I've never done double weave before for a whole project.  I've sampled a bit during a guild meeting.  I've read about it.  I've watched a couple of videos of which some were good and some were rather iffy and not horribly useful.   However I think I've got a reasonable idea of what I should be doing.  It's going to take forever to dress the loom and thread those heddles.  Gosh, I've been threading for what seems like half the day and have maybe 1/5 done.  Of course I'm checking my threading each inch or so, which takes a bit more time.  I'm hoping that saves time in the long run. 

New to me bands I've discovered -  The Dead South, Poor Man's Poison and The Haunted Windchimes.   Something new to listen to while I'm threading heddles.

April 17, 2017

Waffle Weave update, spring cards and woad seed planting

I hemmed all the waffle weave cloths by machine, which meant that they actually got hemmed in record time.    I had tried several different treadlings for the hems, but after trying them all, I preferred to just weave the hems in waffle weave.   They seem to look and act the nicest in the finished towels and are pretty easy to hem.
The two cloths I did with purple cottolin weft, were folded into bunny shapes.  I used them to hold hand poured vanilla scented candles. They are votives and now I'm thinking that I should have put them in votive holders, to make sure the kids burn them safely.  This one isn't waffle weave, but an inadvertent birdseye twill, because I set the treadles in correctly for the pattern I was using.   I even tested and checked it, so I really wasn't paying attention that day as I was halfway through the towel when I noticed it.
I carved this block of spring flowers.  I was thinking about a friend who loves snails, so I added a little snail to the picture.   My son's girlfriend thought they were pretty neat and suggest I sell these on Etsy.   I thought that was a rather nice compliment.
I planted some more Japanese Indigo seed, these ones are destined for the garden, whereas the first batch was grown early, in order to try to produce my own seed.   I also planted some woad seed.   I used old seed and only a few germinated.  I took some of that seed and soaked it overnight, and a few more germinated.  I soaked some seed overnight, layered it in paper towels and set it in a plastic bag, like that grade school science experiment with beans.   A few more seeds germinated.    Then I found the last remaining seeds that a friend gave me more recently.   I soaked those over night and planted them.  So far, none of these last batch have germinated.   But... (happy smile here ) so far enough of the old seed has germinated, using all those extreme methods, that I should have enough to play around with woad pigment later this summer, if I can keep them alive.  I think I have 20 seedlings so far.  If the fresher woad germinates, then I'll have a safety net as well.

I have fresh Madder seed if anyone needs any.  It's from last fall.


February 28, 2017

A New Rug Project

This is a short 6  yard warp which caused me no end of problems.  First, I wanted to use 4/8 cotton in black and natural.  The natural was fine, but I'd gotten to the halfway point and realized that instead of the tube of 4/8 black, I'd grabbed a 2/8 my mistake.  To late to worry about it, I trudged on.  This should have given me some indication of how much attention I was giving this project.   I had a threading error.  I knew I had a threading error but couldn't find it.  Did I stop?  Nope, I kept telling myself that it probably wasn't there and finally when I was 2/3 done the threading, I stopped threading and took a day off to do the block printing.  The next day though, I saw the error so easily.  It was like it had a blinking neon light with an arrow pointing to the mistake. Sheesh..

I unthreaded to just before the halfway mark and figured it all out, except that I hadn't noticed 2 sleying mistakes until I'd already woven way more than I wanted to take out.  I cut it off when finished so that I can resley and will hopefully get 2 more rugs out of the deal,which won't have the mistake in them.

I love blocks of colour and optical illusions; such cool results from an easy weave.


Rug is cut off the loom.  I'll retie the warp after resleying the first block.  I'm going to do one rug in 2 or 3 strands of heavy wool.  The other one I'm considering doing as a multi colour weft.   There is nothing special about this weave structure.  It's just a log cabin done with rags for the dark colour and 4/8 cotton for the light.  I'm happy with the results!


January 22, 2017

Finally get stuff done...

The family was hit with a major virus, which slowed everything down, despite the fact that I managed to avoid the worst of it.   I kept staring at that cotton and the metre of sliver left, trying to will it to be spun.  However, after some effort, I'm finally plying up the last of the cotton.  It is a little bit finer than the last skein but I will admit to rushing most of this, in between periods of ignoring it.  It is definitely time to take a wee break from cotton for a bit.  I do love how easily it spins though.  It is well worth the effort of all those hours of practice to get reasonably proficient, just to be able to spin it without a lot of thought.

The design gamp is off the loom.   It is 9 different threadings wide, by 50 different treadlings long.  There was a little extra warp left that I could have used to experiment with some of my own treadlings, but really, I was not so enamoured with this project that I wanted to do more.   As soon as I was done the last pick of the hem, I chopped it off.  I think it would have helped if I'd remembered that I was using a jack loom and treadled the spaces, rather than the shafts marked.  Then I would have been able to see the patterns as I wove them, rather than weaving them backside up.  That made it a lot harder to catch any treadling errors.  You wouldn't think there would be any as I'd used a direct/universal tie up - but yes, I managed.

I've tensioned all 8 shafts and am winding a warp for a trial project.   It will be a blanket, woven in 2 pieces and joined up the centre.  I realized that I'd need 6 colours to get the block assortment that I was hopeing for.   That grey has blue/green undertones, so I was thinking medium blue or green, dark brown and a dark red.  I may have to put a call out for the red,  see what is hanging out in the guild room, or egads, maybe have to dye some yarn up,  since I didn't notice any on the shelf, in the quick glance I gave it.   There is yarn in a bin though, so it would be so much more time efficient, if some red just happened to be sitting in there.

I made a light box from a tutorial on the web - even without enough light coming through, it allowed for a much better photo than just using a makeshift arrangement of white bristol board.  I used white tissue paper for the sides and top.  It is way to delicate, so one day I will replace it with something sturdier.

October 12, 2016

More Waffle weave

The waffle weave washcloths are off the loom.  I was going for elegant, but they kind of look like ratty old dollar store dishcloths.   However, I washed one up and used it for it's purpose, washing people, not dishes.  OHHHH  MY!    After wet finishing by tossing it in the washer and dryer, the waffle weave had shrunk up nicely.   I was a little disappointed in the amount of loss due to the weave structure and the fact that my sett might be a little loose.  But when I actually used the cloth to wash my face, I experienced a bit of bliss.  It is so much nicer than terry cloth..   So, if they aren't perfectly elegant, it doesn't matter.   They are the perfect replacement item and worth the time spent on weaving them.

So... I wound a new warp.   I had a few partial and single tubes of cotton.  It was a mixture of mercerized and regular 2/8 cotton, though the purple might be just a tad thinner.   I tied it on the the previous waffle weave warp.   As I was sitting there, knotting all the threads together, I had a very intense but useless conversation with my sweetie because he felt there must be a better way to do this.   Hmmmm, now matter how I explained that I was pretty sure there wasn't actually another way to tie each thread together singly, he insisted there must be a better way.   Talk about a conversation going in circles and ending no-where!

I love going from the above and after a few minutes of winding the warp on, it's all straight, smooth and ready to weave.   These are colour gamp waffle weave face cloths.   While it is the same structure as the white ones, I hadn't realized how much interest the changing of colours add.   Plus these are so much prettier and cooler looking. The bonus is all those partial and single cones which I've had for ages are getting used up.   The downside is that most of my bobbins are currently full bits and pieces, so I'll have to dig out some new ones or empty the old as I'll need 6 empty bobbins to rotate through each towel.  
I think I do funky and fun much better than I do elegant :)

October 08, 2016

Waffle Weave


In our guild room, there is a bag of warps, wound off and ready for a project.  While one was a salvaged warp, from a project gone awry, I'm not sure anyone remembers what the project that the other warp was intended for.  I think it is 2/8 cotton and a call went out for possible projects.   I suggested waffle weave wash cloths, and was suddenly expected to put this project on the loom right away!  Yikes!  I have to say that if I'd thought it through and realized that any suggestion would be followed through with the request to put it on the loom immediately, I probably would have kept quiet like the rest of our guild.    It sort of startled me since only one person seemed to consider that the suggestion had any possible merit.

Regardless, having never woven waffle weave of any kind before, I decided that I should try it first, before I dressed the loom for a group project.   Most of our 4 harness looms are counterbalance looms and waffle weave it a bit of an unbalanced weave, so a bit trickier to weave on one of these, though by no means difficult or impossible.  Just have to compensate a bit on some of the picks.  Besides, I'm pretty slow at dressing a loom, tending to work in short sessions, with breaks in between, so if I included travel time, it would take a while and I wanted to be certain that I had it all down pat.

Lessons learned -
First, after doing the math, I realized that in no way would that stray warp be wide enough.  It would need at least another 100 threads or more.

 Second, after checking all sorts of different projects descriptions, I used a sett of 20 for my 2/8 cotton,  but after weaving, I think that a sett of 24 would have made a nicer fabric.  Not that there is anything actually wrong with this cloth, but the waffles would have been tighter and the floats smaller.

Third, machine hems totally rocked on this project.  It saved so much time and looks just fine.

The wash cloth went through the washing machine and came out quite lovely.  It will be very useable.  I'm to to whip up a quick batch of soap and maybe a few candles for a quick gift for the girls in the family.

Fourth, what was I thinking?    I put on 5 1/2 yards of this stuff.  I'm on face cloth number 4 and it looks like there are still miles of warp on the loom.... gah...

Fifth, I really want a loom with more harnesses .   I am hunting around for a reasonably priced 8 or 12 harness loom.  Ya know,  'cause a gazillion yards of repetitive face clothes isn't daunting enough!

August 22, 2016

Clasped weft rug and more.

More Rugs -    Mainly, with this rug, I wanted to clean the used 8 dent reed I'd purchased.  It isn't rusty, so I figured a run over with steel wool might make things worse than better.  Instead, I just threaded it up and started weaving.   The previous rugs I've made were at a sett of 6, which is what some others have suggested, as well as what made sense with a 12 dent reed. Oh, yes, I'm using imperial measurements here, so inches, not centimeters.

Anyway, I had purchased some fabric and had 4 yards of each.   Not enough fabric of either for a solid colour rug, but enough for stripes or in this case, clasped weft.  Because the weft is doubled in each shot, I cut the strips at 3/4 inch wide.  Of course I was using a single sided printed fabric so  tried to be careful about keeping the print side out.  It wasn`t successful in a few shots, but was pretty good thoughout.   What I really noticed about the slightly closer set, was how much the white warp influenced the fabric colours.   Really, at a sett of 8, you could use warp stripes to your advantage, where they wouldn`t be nearly as visible at a sett of 6.    The white really adds a more pastel element to these fabrics.

I`ve never been fond of clasped weft.  I don`t really like the look of it.  Perhaps because it is a more modern feel than I prefer.    I stopped this rug sometime after 45 inches of weaving because I really was tired of how fussy this rug was.  It would be much easier in solids or plain yarn, where you didn`t have to keep the thin strips folded,colour side out, each and every shot.

This is a bright green duvet colour that I found at the thrift store. One side has a rather hideous, and very dated print, while the other is that bright green.  By cutting it in continuous strips, it is adding nice dots of colour in a random but pretty pattern.    Here the white weft, isn`t nearly as overwhelming as the above rug and it does tone down the bright colours nicely.  The strips are 1 1/2 inches wide.  It is making a slightly thinner fabric than the above too.

Interestingly, there are several resources that suggest thinner strips and more of them because they pack in more easily, but so far I haven't notice much of a difference, except that the fatter strips are easier to work with.  They are faster to cut, faster to wind on the shuttle and far easier to keep the colours nicely situated.

Oh - about the reed - almost nothing came off it, it was pretty clean :)
At some point I will need to sit down and finish the ends of all these rugs :(

May 12, 2016

Berries and Weaving

I have a European Black Currant bush in my garden.  In the past 5 years, I have harvested 3 berries.   That's it, a paltry 3 berries.  It isn't that it doesn't bloom.  It gets tons of flowers.  However, as soon as it flowers, we get light frost or a couple of cold days, which cause blossom drop or that is what I think is happening from the Omafra website on currant information.  Anyway, we get a couple of cold days and we don't get berries.  

I was hoping with the very cool weather this spring, that maybe the flowers would just hold off enough to allow a currant harvest this year.   However, they are in full flower right now and we are supposed to have frost on Saturday and Sunday nights :(

For Mother's Day, in hopes of allaying the yearly black currant disappointment, some garden centre hopping happened.   I was looking for a Black Currant variety recommended by Omafra, but couldn't find any at all.  However, I came home with one that has good recommendations.  We also found a North American Black Currant - similar but not the same and much hardier.  Then on Sunday, most of the garden centres were closed, so we went to one that we rarely visit.  My son found me a white currant bush, a pink blueberry bush and then he hunted down a Josta berry bush.  Josta berry is a cross between a gooseberry and a black currant.    Our gooseberry bush is really old.   Everything I read about them says they should be replaced every 10 - 15 years.   I've taken cuttings in hopes of propagating some new ones and then we can replace it with the Josta berry.  If it works, we'll probably have half a dozen gooseberry bushes popping up in weird places though.


I decided to put a quick sample project on the floor loom.   I found this draft of the Birka 10 textile that I put on the warp weighted loom.  It was a small sample, only 15 inches wide, with rug yarn that I sett at 9 ppi, much coarser than the original textile.  I used a light beige colour and a woad blue, the same colours as on the warp weighted loom.  My hopes are that one day, it will be an interesting comparison between the two.  That is of course, presuming that I actually get the warp weighted loom project woven off.

This is off the loom and drying after wet finishing.  


December 15, 2015

Throwing the Shuttles

colours are natural white and a mossy green
I dressed the loom with the cotton warp for tea towels, using  a huck lace pattern.   I chose a project from a magazine and modified it to fit my desired parameters.   Then I started weaving, or at least tried to.   One of the tie ups worked, for a true huck lace weave, but both the warp and the weft spot tie ups, just didn't work at all.  In the end, I resorted to several websites for information, Sharon Alderman's book Mastering Weave Structures and Ann Dixon's Handweavers Pattern Directory in hopes of figuring out what was wrong.  I got some ideas and I now know that I would use the more common huck threading next time instead of this one.    In the end, I started lifting shafts and changing combinations until I found ones that worked for the huck spots.   So totally not what the tie up is in the presented project.    I'd even looked up errata before I'd started, and there was none that I could find.

too lazy to adjust the colours or retake the photo -
All's well that ends well, I suppose, though I spent a good few hours working out the wrinkles in this one.  

The regular huck lace, which uses 2 shafts for an even balance is super easy but as I'm using a counter balance loom, one of the shots in the warp spot pattern is a little small, as it is a 1/3 lifting pattern.  I just have to be careful and slow down a bit because that is much faster in the end than unweaving to catch a skipped thread.

brilliant, multi-coloured cotton warp for a soft scarf
This colourful scarf is from a guild project.   It is made of cotton and has some sort of funky twill design, that you can only see in this photo and not really in real life.   I didn't choose the pattern, but I think it is wasted on the bright multi-coloured, random stripes, at least with the pink weft.  The pattern showed up nicely using a dark blue thread, but it changed the flavour of the project.   I was going to give this away as a present, but my hubby asked for it.  He then explained that he wanted to give it to me, knowing that I likely wouldn't keep it for myself otherwise.  

February 22, 2015

Pin Weaving

One of the Master Spinner 5 homework assignments is to spin a warp yarn and a weft yarn, and then weave a 5 in sample, showing how they work.    For the warp, I spun a worsted yarn, though not a true worsted, using sliver and a short forward draw.    I wasn't sure what piece of equipment I'd use to weave with, so I spun 2 different wefts.  One was a slighter larger grist yarn using a point of contact long draw.  The other was pretty similar to the warp yarn, short forward draw from sliver.  

I can't use my floor loom yet and besides, the amount of loom waste for a sample of this size would be  huge.  I'd have to use a dummy warp and until I have clearance to bend, twist and fold myself into the loom, that just isn't going to happen.   I did think of borrowing one of the guild table looms, but then the message came out from the President, that the table looms were dressed for the next scarf workshop.  My friend Maureen had offered to loan me her granddaughter's rigid heddle loom, but it has a project on it, albeit a stalled project and there was no way I was going to take a child's work off the loom for this.   I was going to borrow my girlfriend's table loom for a few months.  Arrangements had been made back in the autumn, but I forgot to remind her to bring it to an SCA event in November and she forgot to bring it.  That would have been the best solution.

The last time I had to weave a small sample, I'd used a cardboard, makeshift pin loom, which really didn't make the grade.  It bent and I couldn't get a decent sett for the silk yarn I was supposed to use.  So, what to do?  I asked my sweetie to make me a wooden pin loom.  It didn't have to stand the test of time, just survive through one project.  I figured some scrap wood and finishing nails.

This is what he made me.  It is assembled with 2 wood screws at each corner and nicely squared.   The frame will not fall apart.   I lost one of the finishing nails when I was trying to figure out how to remove the woven piece from it.   It was easy once I realized I needed to use my little bodkin needle to flip each yarn loop over the nail head. Someplace hidden in the folds of a pile of fibre, is a lone finishing nail, either happy to have escaped, or mourning,  missing his spot in the upper left corner of the loom.

Because I had requested the nails be set at 5 per inch, which gave me a sett of 10, each nail holding 2 theads, I used the weft yarn which was similar or pretty much the same as the warp.  It is my preferred weaving materials anyway.    I decided to do a straight twill instead of a tabby weave.  That was interesting.  I highly recommend manual weaving like this to truly understand a weave structure.   It is one thing to set the loom up according to a diagram and another to have to pick each row up with a needle.

What I notice the most was how long it took.  It thought easy, peasy, it would be done in no time.  It took a couple of minutes to wind the warp on the loom and 4 hours or so to weave it off.    I only had to unweave a couple of rows and I caught them right away, so that was good.  The bad part was that it was a Ground Hog Day mistake.  Like the movie, I made the mistake 3 or 5 times in a row, after picking out the error each time, before I realized that it was time to take a break.

A couple of hours later I was back weaving. The last few rows were easier than I'd thought.   I knew not to let the warp get too tight while winding it on, so I had enough play in the threads at the end.  I'd used a bodkin, for threading cords, rather than a sharp needle.  This turned out to work really well, as I didn't ever catch the warp on the needle.  When it was off the loom, I wet finished it with a bit of agitation in some warm soapy water.  After rinsing, I was going to give it a hard press, but not only can I not bend enough to  access the outlet to plug in the iron, but Kevin kept trying to sleep on the wet sample.  I decided to let it dry au natural, up high, where Kevin can't reach it.


 I really dislike the selvedges.  They are a little loopy and look sloppy.  I don't know if it is my technique or just a result of the pin loom itself.    However the weaving is fine.  I caught all my mistakes and it is nice enough for my homework sample.   It would have been better if it were hard pressed, but maybe I'll remember it before my homework is ready to ship and can re-finish it then, if I really think it needs it.

I can't imagine doing a large project with this method of weaving though. 

March 01, 2012

Off the needles, out of the pot, but still on the loom!

 Another pair of socks off the needles.  I wore them yesterday and they are quite comfy.  They are definitely striking in colour and pattern, perfect to wear on a grey day.   They were a fun and easy pattern to knit.  I held off on trying a slip stitch pattern because I thought the slipped stitches would catch or some such thing.  I had no problems with them and would use a slip stitch pattern again!  It sure put a bit of life into an otherwise plain stripey pattern.

It seems like eons ago,  I made these socks from yarn I'd dyed with food colours.   However many washings and line drying in the sunshine later, they had faded badly.  I rather liked the bright pinks, blues and purples but sometimes the food colours don't stand up to that much sunshine.   So I heated up a pot of water, added a glug of vinegar and a dollop of pink dye and overdyed the socks..  They are much more pink than I'd planned but I love the colour.    I used too much dye.  I had to add some fibre in to assist in the take up.  If I'd have added half the dye, the stripey contrasts would have been brighter.  None the less, they are happily back in the sock rotation, for days when warmth and pinkness are needed!


On the loom, after the basket weave towel was finished, I started a broken chevron pattern.  It's simple enough to treadle and looks nice in the natural and blue colours.  It was a fairly quick weave as well.


Then I did a straight, plain twill, putting in some yellow stripes at each end with a reverse treadling.   They are pretty too.  I'm rather liking the simplicity of these patterns.  The bobbin of blue was almost empty and while I'm pretty sure there is enough blue 2/8 cotton left on the tube for another towel, it would be cutting it close to do another blue towel.  I switched up to a deep red, also 2/8 cotton.  


The handwoven shawl project was a fussy weave.  The threads were a bit sticky and the selvedges were a bit of a nuisance.  It's nice to have a straight forward weaving project, which proceeds effortlessly and weaves off quickly, if one so wishes to do so.  The next weaving project will most likely be a bit fussy, so I'm enjoying the speed and simplicity while I can.