Pages

April 09, 2019

Starting but not finishing

I've started lots of projects, but not actually finished much lately.

I am working on an 1830's dress block.  It's started, but I'm still working on fitting it.   I am quite slow to actually fit clothing for myself.  I find it fussy and difficult.  It's so much easier to fit someone else!  I don't have anyone local who can help me with this, so it's a solitary task which I have to work to keep it in focus.

I've been spinning. I realized I hadn't been spinning on the Kromski Sonata in ages, so I pulled it out of it's storage bag and set it up.   I'll have to admit that my Minstrel is what I consider my workhorse spinning wheel.  It does everything I ask of it and is super easy to work with.  However, it isn't very portable. I like to keep up with the Sonata as it's my demo wheel and I like demos to go smoothly and effortlessly.  Practice is the only way that happens.

Usually these days I keep a cotton project on the Sonata because few people ever demo cotton, but that came off and I put on some white Ramie.   I got half done it and realized I was about to do a demo and since it was a local gig based on "pioneer" days, I figured that wool was a better choice.  Off came the bobbin of ramie and on the new bobbin, I started spinning some lovely, super soft Merino.   I got home and a couple of days later I was playing with fibres for traditional rug hooking.  I spun up some of that gifted unknown but strong fibres looking for the right grist.   The bottom bobbin is plied, but I'm still not happy with it, even though it's lovely, evenly spun yarn.  It won't work for what I want to use it for.


I've been working on Pysanky for Easter and for a demo and Westfield on Good Friday this year.   I tried a few new things like using one of my green eggs when I was out of white ones.   My daughter liked it, but to me it threw the colours off.   I also tried painting small spaces with a brush rather than a whole dip.  This worked well, but on my sample, it showed as black, which won't work with a black background.  I also found out that without my task light, I leave too many little uncovered spots when waxing over a large area.  Right now my task light is on some woad plants I've started early.

 I took an introductory class in Traditional Rug Hooking.   I enjoyed it immensely and realized it would be a great addition to my demo skills for Westfield.   I had a bunch of ideas for rug patterns, but ended up doing a slightly more modern one which I decided wouldn't over reach my very beginner skills.  I'm using handspun yarn instead of wool strips because I have lots of yarn and very little wool fabric.  Since we are finishing the roof this summer, putting in the rest of the raised beds, adding new gravel to the driveway and I'm really hoping to take a real holiday for a few days, I decided against purchasing commercial wools from the Hooking shops, due to cost.   I'm pretty sure that I have handspun yarn samples that are close to the right grist that I can use up.

The yarns are generally white or grey though, so I've been dyeing them up.   I've been using up some Procion MX dyes, using them as acid dyes and I've found they are a little bit more difficult to get good varigated colours with on wools.  I do love the bright colours though.  I have more dyeing to do before I'll have enough yarn and colours.  

I've got some scarves on the loom.   They are long and sparkly.  I am playing with sett though as the first one looked nice but was a bit firm.  I dropped it down 2 threads per inch and it was obviously too loose.  So I re-sleyed again and am hoping that third time is lucky and I've got it right.

Added to this is all the pre-event planning which happens before a weekend long SCA camping event.   We've had a few lovely days, sandwiched in between cold, rainy, dreary weather.   Oh, I'd like the sun and warmth back please!

Got scraps of wool fabric too small for hoods or trim?  I'll take them!


March 26, 2019

Checked Double Weave Wool Blanket

The checked double weave blanket is off the loom.  All I did after cutting it off was to do a quick zigzag stitch on both ends to keep the blanket from fraying before it was finished.   I had entertained the thought of twisting fringes, but when I cut it off, I managed to cut off the fringe allowance on the front.   I actually don't really like blankets with fringes on the ends.  They look spectacular for sure.  However functionality is suspect.  Fringes get in the way.  They tickle your face and nose.  The cause much too much excitement for the cats, who think they are built in toys.   They dangle into your tea when you least expect it and drag on the ground when you wrap yourself in the blanket.

 I thought the fringes would look nice.  I'm really glad I don't have fringes.   I cut this off the loom on Sunday.  I let it sit and relax until Monday afternoon when I started looking for and fixing skipped threads.  I finished those and hemmed it while visiting with my daughter.    I tossed it in the washer last night for a partial fulling.   Today I cut off all the thousands of ends.   I had tons of bobbin changes.  Not only did I need to switch bobbins  and shuttles for each colour change,but with doing the 60ish inches wide, a single bobbin only did about 16-20 rows.   There a lot of bobbin changes.

I almost took a photo of the ginormous pile of ends and bits I'd cut off.  But then I thought of a bunch of cooking blogs I'd visited which have photos of the ingredients, photos of the empty bowl and spoon, photos of the addition of each ingredient, each step, and then 12 photos of the finished product, from various angles and with different crispness in focus etc.   It's like you can't just jot down the recipe and a series of steps anymore.  Instead you need to tell everyone that your second cousin twice removed's stepmothers sister, loves the recipe so much she framed it for posterity, with 47 photos of the production of the recipe because we all have so much spare time these days that we can spend 10 minutes scrolling down to find the recipe is hidden behind a link button.   ARGh..

 Really, I don't care and didn't think anyone else would care about a pile of short cut bits of yarn either.   I did notice I missed 3 ends on one side which needed to be stitched in, which I did and while doing that I found 2 other skipped threads that I'd missed.  When I went back to fix them, I couldn't find them at all.   After hanging a load of laundry on the line, I came back to toss the blanket in the washer for a second fulling, but had to wait as our very old cat had poked around to move it so he could have a nap on it.  Eventually he moved and I got the blanket in for a second wash.  This was a short wash, on warm wash/cold rinse, so there was a bit more fulling action.   It's not as thick as the last blanket, but it's not flimsy and airy either.   It has a nice weight and isn't going to stretch or wear badly.    And.... my hubby decided that he "really liked it".    Now I think this means I need to make another blanket.   It won't be checks though as that is just too much work.

Specs -
  It was 63" wide by 113" long right off the loom.  This was my 36 in Fanny so I'm pretty happy about that.

After the hemming and the first fulling, it was 58 " x 103 "

Final size after second fulling -  52" x 95"

March 18, 2019

Our Maple syrup process

We use plastic sap buckets to collect maple sap.  The lids keep out rain and much debris.  They were what was available locally which was the major factor in our decision to use them.  Before the plastic was available, metal buckets were used.  You can still get them some places, or find them used.  Very large and sturdy plastic bag containers are made for this purpose as well.  You can also run a hose from the spile (the spout in the tree) into a bucket, and collect sap that way.   Commercial producers often run a hose from tree to tree, and collect it in large drums at the end of each line.   Things get high tech from there with commercial vacuum systems of various types.   It also seems that each container holds a different volume and every shop seems to have a different selection of equipment available.   We choose what we could not only find, but knew would work for our very small operation.

We made an evaporator over our fire pit using an old Franklin stove we found in the basement.   We use rectangular roasting pans and a 2 pan format.  We use one pan for boiling and the second pan to pre-heat sap, so it doesn't cool down the boil pan when used to top up.

It takes about 40 litres of sap to make 1 litre of syrup. That also depends on the type of Maple tree you are tapping and the year as both are variables on what that year's sap to syrup ratio will be.   This weekend was our first boil.  We had about 120 litres of sap and got just under 3 litres of syrup. 

I finish the syrup in the house.  The final temperature needs to be about 219F- 220F.   While it can take time to get close, I find that last few degrees often come to temperature quickly.  Once it does, I pour the syrup through a paper or fibre syrup filter.  I then reheat the syrup for a few minutes, and pour it into prepared, hot, sterilized jars.   I wipe the jar rims and pop on 2 piece lids.   Some people run their syrup through a hot water canning bath, but none of the Agriculture departments say this is necessary.   Maple syrup has about a 60 percent sugar content so not much will grow in that environment.  
Because of the length of time it takes to reduce the sap, we get a lot of caramelization.  This really means that we don't get that very pale light syrup that commercial producers can get.    What we do get though has a really good, strong Maple flavour.    YUM!


 I'm off to make pancakes :)

March 13, 2019

Doubleweave and signs of spring

 This warp was threaded pretty easily.  I'm not sure why, but I designed the stripe based on the finished width of the fabric in inches, and didn't take the thread count into consideration.   IN order to make it work, I had to add a few threads, so it's wider than I had planned, which isn't a bad thing for a blanket.
It's slow weaving though.   I much prefer the Finnish Toika temple.   I think it is easier to use.   The little spiky points at the end are easier to set into the fabric and it's thinner so you can see the fabric while you're weaving.  I'm having to be very careful because the spikes often miss the second layer and the width hides skipped threads until I am almost a whole block up.  Because it's double weave, it takes 4 shots of the shuttle to show 2 shots on the top layer, so it's double the unweaving to correct a mistake..   Egads!  Sometimes it seems like it has been 2 steps forward and 2 steps back.
The sap is running and buckets are up!  Yay!  That is a sure sign that spring is on the way.

March 05, 2019

More Double Weave.

 I'm making another double weave blanket.  Not only did I really enjoy making the last one, but I decided I want to learn more about double weave.   Working on making double wide fabric competently is my next step.   Another blanket is the project because a) I have the materials on hand and b) I've hardly gotten to use the blanket I just made.   It seems it is currently a favourite cuddle spot.

I'm sure that once the latest stupid cold weather passes, the cats' interest will also pass, but then I won't need it either!
Dion uses the blnaket the most.  I find him on it at least once a day, usually more often.


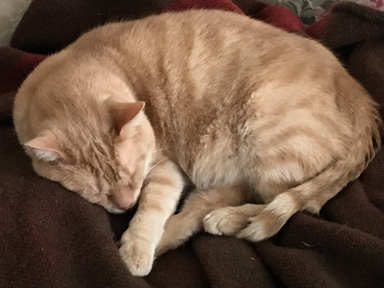
Mu, or Cat as we call him because for a long time he was our only cat, also loves this blanket.  He's old though, about 16 and too skinny, so it probably keeps him warm.
Dion again.   One day I found 3 cats curled up on this blanket.  It is certifiably kitty approved.

 The new blanket is planned to be 26 in wide on the loom.  It is 2 colours, with 2 in. alternating blocks in a checky pattern.   If I'm going to learn about the weave structure, I thought it was good to do a pattern requiring  a little more effort than the first one.     The yarn is wool I had on hand, purchased for another project which never made it up in the project queue.  I'm using the same threading as last time, although I didn't tie this project on as it's planned to be wider than the first blanket.

March 01, 2019

Double Weave blanket

The double weave wool  blanket is off the loom.    I wove it to about 87 inches long.  My plan was 85inches but there I did a couple of inches more just because length wasn't so much of an issue.   It came off the loom at about 82 long and 44 wide.   Because of the learning curve with the temple, there was a bit of packing in the centre line where the two sides attached.  I easily pulled out 2 threads from the centre which gave enough space for the rest of the threads to spread out.  Because it was tabby weave, I had to pull out 2 threads to make sure the weave structure was continuous.


I probably should have left enough for fringes, but I have discovered that I don't like blankets which have fringes.  They tickle my neck and face, and arms and wherever else those fringes end up.  I find it most annoying.  However, I just ran the ends through my sewing machine with a zig zag stitch,  cut the ends about 1 inch from that and put the blanket in the washer for wet finishing.   I also put in a pair of jeans and a couple of other items to balance the load.

I used warm water -  I only use warm for finishing fabrics.   I set it for the normal cycle, but only for a short agitation time.  I checked it a couple of times and ended up letting it run the whole cycle.   I pulled it out and still wasn't happy with the fulling -  I wanted it fairly dense so I could do some embroidery on the red band.   I shortened the time cycle and ran it through the washer again.   This time though, I got distracted by loading the woodstoves and by the time I returned to the washer, it was the spin cycle.   

So yes, it did full just a little more than I wanted.  I lost 10 inches in length and 4 inches in width..  I've tried embroidering on it and it's just a little more fuzzy and dense than I'd prefer for that.  On the plus side, it's fuzzy and almost soft.  It is amazingly warm.  At one point there were 3 cats cuddled up on it and no room for me.   

I hemmed it after it was fulled.  I used the thrums to hem it, so the yarns match.  In hindsight, I probably should have hemmed it before I fulled it instead of after so that the hemming threads would full as well and become virtually invisible.  They aren't easy to see as it is, but in a perfect world......

From a distance, it looks a greeny-brown with a red stripe.  It isn't until you are up close that you can see the different coloured weft and warp.   The colour variations in these photos aren't noticeable by most people.  Nobody has commented on it as of yet.     It was really difficult to get a good colour representation.  The middle photo is closest but it's still too bright.

This was a fun project.   Once I started weaving, double weave made so much sense.  It was ridiculously easy.  I had a few skipped threads on top, and only one on the bottom.  There were no threads attaching the two layers in the wrong places.   The temple made the selvedges easy, once I figured it out.    Anyway, I'm super happy with this blanket.   Super, Super Happy!

February 23, 2019

Double Weave and New Shoes!

I'm finally weaving.  It's been slow going though.   First, I had the worst time threading the single stripe which is on the bottom layer.   I ended up rethreading it 5 times.   Then, when I thought I was good to go, Phil, my sweet orange kitty helper, wouldn't be persuaded to leave the loom alone.   In the end, I re-threaded ALL the heddles and re-sleyed the whole thing.  I very quickly tied everything on so that no more kitty helping could interfere!

Then I waffled about warp colours.  Originally I was going to do the red, so as to have a solid red stripe.   After sampling, I then thought that the red was a little to bright, so was going to switch out for green.  However after checking out my supplies, I didn't have enough green, so I went back to the red.  Now, seeing how much red I've actually used, I probably did have enough green.   I don't really like playing yarn chicken with my projects though, so I'm happy enough with the colour choices.

Then, the 1st treadle in my pattern, started getting caught in the loops of the treadle beside it.  Since it was an unused treadle, I pulled out the pin holding the cords and set it on the ground the way we do with some beginner classes.   Next, the first shaft kept unhooking from the lam.   Then once in a while the second one would unhook.  Talk about a nuisance.   I had to crawl under the loom, re-attach the hook and then unweave what ever few rows I had done because there was invariably a skipped thread.    Finally the brake spring slipped off.   How does that even happen?  The result of that was having to wait for someone stronger than myself to hook it back up.     ARGH! 

So far I've been pretty thrilled that I can slip my hand between both layers and thus working like it's intended to work.   I've also been using a temple.   I'm actually enjoying it.   There is definitely a learning curve for selvedges, but even if the only benefit is that there is less abrasion on the outer threads I think it is worth it.

New shoes!  Runners are almost as good as new boots, almost but not quite.  Still, they are comfortable, although maybe a bit bright.   They were on sale but of course the blue ones were already sold out in my size.    They are very spring-like and are happy coloured shoes.

Soon I'll have a picture of my seedlings.  Japanese Indigo seeds have sprouted.  They were a bit unevenly timed as some seemed to start right away while other seeds took their sweet time.  I ended up soaking some seeds overnight which helped a lot.  I also planted 4 white cotton seeds.  I think I have some green ones around as well.  If I can find them, I will try to start them also.  The green cotton seeds are a few years old though so might not still be viable.   Still, things growing always makes me happy!