Pages

June 20, 2021

Just playing around with colour

I found a ziplock baggie with 89g of white merino stashed away.   It wasn't in a place where I expected it to be.   I pulled out the slow cooker which never got hot enough to actually finish cooking whatever food was in it, and put in a couple of inches of water, and a few glugs of white vinegar.  I put the merino roving in to the slow cooker to soak for a bit, then turned it on and added some red and yellow dye.

I'm happy to say that while I never actually was able to finish cooking a meal in this slow cooker as it never seemed to get hot enough, it did an admirable job with dyeing.   I did keep a check on it now and again, but I was pretty much worry free.   After a few hours in the pot and the dye was exhausted, I turned off the crock pot and let it cool down overnight.   The next morning I pulled out this lovely flame coloured roving.    Yay for colour!

Then in the same box, of odds and ends, I found a bag of purple and pink mill ends which I'd dyed a while ago.  I didn't feel like dragging out the drum carder, so I just pre-drafted the bits that I could and hand carded the rest.  

Once I'd finished spinning the second bobbin of cotton, and plying the two for 318 yards of white 2 ply  cotton,  I started spinning the purple/pink.   I'm on the second bobbin so will hopefully get to start plying soon.   There isn't a lot of it but it's pretty and after spinning all sorts of white fibres over the past few months, it has been a joy to play with colour.

Playing with colour and paints.   The top row is trying out a new set of watercolours in pans.  The bottom row of cards is using the old gouache paints I've had for ages.  So much fun!


June 14, 2021

Spinning

This is 298 yards of 2 ply merino.   It's lace weight and I haven't yet spun enough of it to use it for any real project.  Maybe a scarf could be made from this, but I really, really don't like knitting scarves.  I'd want much more yardage in order to weave scarves.  If I'm going to dress the loom for a scarf, I'd better have enough supplies for 2, 3 or better yet, 4 scarves.  Same amount of work to dress the loom,  for more woven items!   

It's super soft, bouncy and I've no idea what to use it for.    

I was a bit tired of spinning fine white yarn though, so I dug through some of the bits and pieces looking for some dyed wool.   I found absolutely nothing in the way of dyed wool roving in my stash.   How did I let that happen?   Next I thought that I'd spin some flax. Spinning flax and cotton are both fibres I need to practice periodically.   Since I spin neither of these fibres as much as I do wool, I like to keep my spinning muscle memory active.  I can always tell when it's been too long as it takes me a few yards to get warmed up and spinning them comfortably.


I had this idea to spin some flax.  I set up my wheel for flax spinning.  I filled my lovely little pottery flax water pot and hung it on the wheel.   Then I routed through my stash for some flax, but instead grabbed a bag of Egyptian cotton sliver.   Why I changed my mind, I don't know.   It's not like I don't like spinning cotton.  I love it.  It's a fairly fast spinning fibre, using a point of contact long draw.   I spin it relatively well.  What I don't really love is this particular cotton sliver.  It's white.  It's commercially prepared, so while it's relatively long staple, about 1 1/4 inch, it's super slick and slippery.   It takes a bit more effort to get it to spin nicely than the coloured cotton rovings which are processed with a bit of crimp left in, making them easy to spin.

I started off spinning this years ago, by making punis from sliver, to give it that little bit of tension which made it easier to spin.   A puni is a very tight, small rolag.   You roll the fibre off the handcarders, using a thin dowel as a puni core to get the cotton fibres rolled tightly.    Then you slide the dowel out and the puni is ready to spin.     It's been a while  since I've spun this particular cotton sliver, so I'd totally forgotten that I needed to make punis.   After spinning a few yards though, I realized that I didn't actually have to make punis and I was spinning it just fine.   I guess practice does make perfect.

I emptied 3 bobbins with flax singles on them.   It took a while, which was why I'd kept putting this
chore off.  It's done and they are stashed with the rest of my spun flax/linen yarn, for a future project.  I also dug through the bin and noticed that I'd been tossing in the bags of flax fibre.  I'd thought I was out of flax, but nope, I have some left.  I'd just hidden it.

Yes, the flax is pretty much the same colour as the weathered board.   Maybe a little browner, but washed out because at the particular moment I snapped the shutter, the sun came out!


June 08, 2021

Finished the Socks!


 A while back, before the latest Covid lock down, my daughter gave me 7 balls of sock yarn, suggesting that we trade.  She'd give me the yarn and I'd give her back socks.   I don't think I'd have made this trade with anyone else, but since she's my daughter, I didn't mind.

It had been several years since I'd knit socks, so I had to relearn the steps.  It wasn't difficult, but I did have to restart several socks, a couple of times because I'd forgotten how the yarns worked.   Kroy is a sturdy and easy to knit yarn, but it's not as fine as most sock yarns, and I needed to change my stitches and gauge.

The bright unicorn fart yarn wasn't in the original back of yarns.   Instead there was a bright red yarn, but it was wool, rayon and nylon.   I didn't really like the rayon aspect, so I switched it out for the stripey yarn.  At first, I was going to make them for me, but the more I thought about the rayon sock yarn, the more I said nope...just not happening.   So my daughter got the fun striped socks.

I also used this project to experiment with different heels.   I did the German Short Row heel.  Ick.  It didn't fit me at all when I tried it on.   I also had to use markers to keep track of my stitches, which became a royal pain in the butt.   My next heel type was the square heel.   That was one sweet heel to knit.  It was easy to knit, looked fine but also didn't fit me at all.   I ended up doing the round heel that I normally use on the final pair of socks.   It fit me just fine.     Nice to note though, that they all fit my daughter just fine.   

I was doing some rug hooking but having a wool rug on your lap when it's 30C outside and no AC inside, just isn't doable.   If I had a gripper strip hooking frame on a stand, or a Cheticamp style frame,  then hooking could happen.   However I use a small, plastic hoop.  It isn't big enough to be supported and ends up flopping the whole rug on my lap.   It's just too warm right now, with this unseasonably early heat wave!

I have spun and plied some lovely Merino.  It's another skein of white yarn, so I haven't yet photographed it.   I'm beginning to wish I had some dyed roving to play with, just for a change. 


Woad plants are happy.   Japanese Indigo is very happy.   I have Weld plants again this year which makes me happy!  Yay!

May 29, 2021

Missing month of May


 It's been a busy month.   The weather has been up and down.   We had a stretch of milder temperatures with no frost for several weeks.  I took the opportunity to get much of my garden in.   According to the Canada Natural Resources we are in hardiness zone 6a.    Our last frost date is supposed to be May 11 according to OMAFRA.   I lost two pepper plants last night because it got really cold and this evening I just covered all my tender plants and put feed sacks and straw around the tomatoes.    Sadly, I don't have enough sheets and covers for all the planters on the deck, so hopefully the patchy frost which is forecast for tonight, will not get to the deck.   There are two tomatoes at the back which don't have cages to support them yet, so they are just buried in the straw which I'm using as extra mulch over the cardboard.

The straw bale garden experiment is doing quite well.   The lettuce has loved it so much that I've already harvested our first salad.    The cucumbers are doing okay and beans are already coming up.  Again though, the tender new leaves are being snipped off just as they come up.   I've had to put a ratty whirly gig, faded but still spins, and some hoops over the bean seedlings to hopefully keep whatever is eating them away.   

I've seen some pretty spectacular photos and reports of straw bale gardening success, and an occasional report that it doesn't work.   I've heard of issues with bad straw, or people using hay and getting lots of weed growth.  Also, you really have to condition the bales to jump start the internal composting in order to actually have them sustain the plants.  It also requires keeping on top of watering.   Since I don't have a drip system for my bales, it means I have to go out and give them a bit of water once a day, or twice on really hot days.  It's totally not a no work garden this way.   But way less weeding, is what I'm finding.   I've been weeding the raised beds multiple times and it seems the weeds pop back the next day.  I've the Japanese Indigo bed covered, so my fingers are crossed that they'll be okay with tonight's weather.   I usually put them under cloches, but with the early May weather being mild, I didn't bother this year.    Next year for sure, as I won't risk it again.

We've been walking the local trails.   Once thing I've noticed is that some of them look so different in the spring.   This trail was unbelievably different looking with the heavy hardwood tree canopy and lush fern covered forest floor.   It's a joy to traverse the trail while we still have few mosquitoes.


Canadian geese seen yesterday.   They are huge birds!   These didn't have babies with them, which I'd normally expect to see in the spring.   Still they were a joy to watch while they paddled along until they spread their wings and headed off with a lot of honking and fanfare.


April 22, 2021

Early Spring in the Garden


 During those unseasonably warm and lovely almost summery days in early April, I got 3 of the 4 raised beds cleaned up.  I removed any remaining plants that I'd left from last summer, weeded them twice.  There was some volunteer garlic growing in one bed, so I dug up a couple of clumps and transplanted it into one of the beds.  I wasn't going to grow garlic this year, but free and unexpected plants!   The bulbs should still have time to develop.   

I took some of the lettuces that had germinated in the winter sowing containers and transplanted them into the garden and covered them with plastic cloches.    I have some woad almost big enough to transplant and some Japanese Indigo which is ready to move into the garden, but it's still too early.

We've had snow and below freezing temperatures for the past couple of days.   The daffodils flowers are bent over from the snow and the cold.  They'll pop back up when the weather warms up, but they look so sad.   I had just started transplanting the winter onions from the main garden to this raised bed.  It snowed the next day, so they didn't even have a chance to settle in.   They're pretty hardy though.  I don't imagine they'll have a problem.   I've more to move over.  I want to till that part of the garden this year, and the over wintering onions will just get in the way.  Plus these ones are almost sweet and a lovely addition to a salad or stir fry.  I don't want to lose them.

I read a couple of books on Straw Bale gardening and decided to experiment with it.  This part of the garden gets dug up by the chooks and because of the proximity of the surrounding pastures, is difficult to keep clear of weeds.

I laid down a lot of cardboard and put the straw bales on top of it.   The bales need to be conditioned so that the insides start to compost before planting them.  Both seeds and starter plants can be used.  Most of the bales won't need to start being conditioned until May 1st.  I conditioned two of them early so that I could plant onion sets, beets and chard, which are all safe to plant in cooler weather. Plus I wanted to start playing in the dirt, so an early start for some of the bales allowed me to do that.

While I could see subtle changes in the straw bales that were getting the water and nitrogen, I wondered if it was really working.  The instructions say that the centre of the bale will warm up.   It was just above freezing and the unconditioned bale inside was the same temperature as the ambient air temperature.  The inside of the conditioned bale was over 10 C degrees warmer.   Once our cold and snowy weather moves on, I'll put a bit of potting soil on the top of the bales to hold the seeds while they root, and plant the onion sets on the outside edges of the bales.  The beets and chard will go in the middle.  I've seen so many photos and read so many reviews of this method that show amazing gardens, that it was worth the bit of start up costs to purchase the bales and nutrients to get started.   The cardboard was free though and I've had great results using cardboard as a mulch.  By the end of the summer, it's starting to break down and it's composted completely by the spring.

Dye Plants-  I have a bunch of mature Madder which needs to be dug and used.   There will be a load of woad seeds later this summer and I have lots of woad seedlings to plant.    I have Japanese Indigo seedlings as well.  I'm thrilled that there is a surviving weld plant.    Last summer I stopped watering the raised beds because we had weeks of hot weather and no rain.   I didn't want to over burden our well with watering both the raised beds and the regular garden, so the raised beds were sacrificed  as they needed watering 2 or 3 times a day.   Having a weld plant which will go to seed this summer means I will have weld to play with next summer.   Plus a friend gave me some of her extra weld seed, and I've got some planted for seedlings.  The rest I'll scatter in the weld bed. My Dyer's Greenweed is totally planted in the wrong place, but it's at least surviving.   I don't really have another place to put it right now, so I'll leave it where it is.  At least the bunnies didn't eat it this year.  Last year they gnawed it practically to the ground and the poor plant had to regrow completely.


April 18, 2021

Colours of Early Spring

These Scilla flowers are the prettiest blue.  They are naturalizing in areas, carpeting the lawn for the time they are in bloom. 
Glory of the snow?, I thought they had another name too, but whatever they're called, they are beautiful.  I had to wait to the evening to photograph these because the white centres were difficult to photograph, without washing out completely.
Coltsfoot is a lovely splash of yellow.   I found these on the side of one of the local trails.   


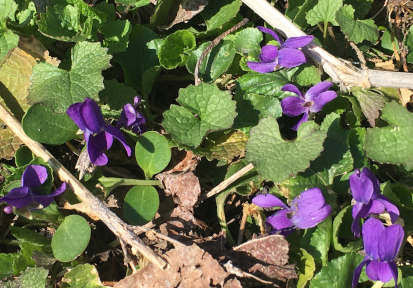
Wild violets just starting to emerge.   Again, from a local trail and not my garden.  Because they can be invasive, I'm not unhappy about that. 
 
I saw these on one of the trails too.  I think they are bloodroot.   They aren't that common around here, so it was a nice treat to see them.  The roots can be used as a dye plant, but since there are so few of them around here, I haven't experimented with it yet.


April 15, 2021

Carrot Seed Tape

Yesterday I made some carrot seed tape.   Carrot seed is tiny and the seed packets come with planting instructions that say, sprinkle seed, cover with light soil and when it germinates, thin to 2 in or more apart.   It always seems a waste and a lot of work, to plant too closely and pluck out a ton of little seedlings.

I found all sorts of instructions on the web for making seed tape, which is a basically a strip of paper, with seeds glued to it.    I took 2 ply toilet paper, separated the plies so I was working with a single ply and then folded the ply lengthwise and cut it in half, to make 4 seed tape strips.

I made a flour and water paste and made way to much of it.   Next time, I'd use a scant tablespoon of flour with a tablespoon or a bit more,  of water to make a runny slurry, like you'd use when making paper maché as a kid.   I used a cotton swab as a paint brush and dabbed little dots of the flour glue along one 1/3 of the paper strip.   This was so that I could fold over the paper and encase the seeds as a bit of storage protection.
 I tried several methods to put the  seeds on the flour paste dots, but most were messy.  The seed was  too tiny to just use my fingers.   A cotton swab with the tiniest bit of flour paste on it worked well for the first 3 or 4 dots, and then got too sticky.  In the end, a pair of tweezers with a needle nose like tip worked best for me.

I dabbed a bit of the paste on the edge of the paper that didn't have the seeds on it, folded it over and gently pressed it down.   I left it spread out to dry, which took far less time than I thought it would.


 When it was dry, I remembered to label it.  I used a fine point marker.  Then I folded up the strips and stored them in a plastic bag to keep them safe until needed.  

I sized my paper strips to fit the area where I'm planting them.   

You could use paper towel, newsprint, tissue paper etc.   It needs to be something that will fall apart quickly when wet though.

I only used one seed per dot, about 1 1/2 - 2 inches apart.  I didn't measure, just eyeballed it, because the cat kept trying to play with the tape measure while I was using it.  

  I did wonder though if I should have put 2 seeds on each dot.  It would still mean some thinning, but less chance of a bare spot because a seed didn't germinate.

I wouldn't use this for large seeds.  Beans, peas etc are easy to plant but the very fine seed is a bit fussy.  We'll see how this method works.   Fingers crossed.