Pages

Showing posts with label dyeing. Show all posts

March 09, 2025

Hints of spring

Finally, we've had some weather which has allowed for the snow to start melting.   This leaves the snow, especially the snow banks dirty and grey.   I love this because I see it as a symbol of hope of the incoming spring.   

The ground is still frozen though, so the melting snow is running off into the lowest areas.  Luckily we have some drainage in the farm land around here which helps those areas.  It hasn't been warm enough for the frozen water in the ditches to melt though, so the snow melt is running over the frozen ground, making for a very muddy top inch of soil and grass.   It won't last though, because a few more mild days are forecast which should help a lot.  Right now though, much of this water is running right into the barn, making parts of it a frozen mess.

I've made some more of the comfort dolls.  A friend and I took a field trip to a yarn store in a nearby town, which was highly discounting sock yarn.  It was $.97 a 100 g skein!  There were limited colours available but I still purchased a good few skeins.  What there weren't though were solid colours.   My friend dug down and found some of this pink, which she passed one skein on to me to make more comfort dolls.  I thought it might be good skin tone, but it's very pink.  Instead I managed to make a pig girl.   I didn't have a crochet hook small enough, so making the hair was not fun at all.  Still, I'm hoping someone will love her.

I've almost finished spinning up the cashmere merino singles.  There is only a handful of roving left, but my bobbins were full.  Not having access to the deck and table where I usually do my dyeing, I tried a different technique in a roasting pan.   It was not a huge success.   I managed to label my black dye as brown.  I wanted brown.  I also should have diluted the dye a lot more.

I soaked the yarn for several hours.   I chose not to add vinegar to acidify the water, which I would do next time.   I lay the skeins in a roasting pan, and squirted and dabbed dye on the yarn, in what should have been short runs of colour.   I then added the vinegar and water to do a low water dye on what I hoped to be similar to a painted skein.

Nope, the dye ran, and the black which should have been brown, dyed all the white spaces I left.   Because I didn't dilute the dye enough, it's much darker than I'd anticipated or hoped for.


Look at the lovely blue sky though! And the snow is melting.  You can see the grass in spots!   I don't feel bad about the dye experiment because there are hints of spring today and it is glorious!


March 04, 2021

The sap isn't running!

 We've been having connectivity issues on and off for a while.  Last week it suddenly got worse and then poof, we had no connection whatsoever.   After rebooting modems, unplugging and re-plugging, turning off and turning on, we had to call for assistance.   We got the normal please turn off and then turn on.   Then the next step was unplug and re-plug, but using a lot more words.   By now, my sweetie was getting frustrated, because we'd done all that multiple times.  He went outside to check the dish and it was unplugged.   He plugged it back in, but the connection was obviously loose . Our connection lasted 3 minutes and was so slow.   Once he relayed this info, we had a repair guy here at 8 am the next day.  It turns out that because our dish was installed on a tree and not a post, the tree grows and loosens or pushes out the bolts.  In our case, it snapped 3 of the bolts, which put the dish out of position.  As well, the cable connector hadn't fared well either, and needed a replacement.  In all, the poor repair guy, didn't just do a simple repair, but pretty much had to reinstall the whole kit and caboodle.   It took him  a bit of time because it was a miserably blustery, cold day with snow squalls, but by mid morning, he was on his way and I got to check my email!   Yay!

I wet finished the blue striped tea towels. Everything that could go wrong with these, did so.  I ended up with only 4 towels instead of 5.  Not a huge deal because I'd planned for 4 but had enough loom wasted for a 5th because I'd tied on to a previous warp.   They are the same pattern was the pink and green, but using a series of different shades of blue.   I think  I like this better because the colours are less affected by the warp colour.  Also because they are blue.  :) or at least they don't have green in them.   


I over dyed the red and whitish yarn that I didn't like.  The white went a dirty colour with just a hint of peach.  I thought it was ugly.  I left it lying around the living room so I could get used to it and it still didn't appeal to me.   So I soaked it in some vinegar and water, and put some spots of dye on it.   I was going to do sprinkles of dry dye but realized that I didn't want to waste one of my good masks doing this.  If I'm going to sprinkle dry dye, I want good lung protection.   Instead, I found 3 packets of Kool-aid that I'd picked up on a whim when they were at the check out at the outlet store, ages ago.   I had pink lemonade, mango and blue raspberry.   The pink was pale and insipid, but combined with the other two colours, it made  a lovely combination.   I love the yarn now.   I want to use it as weft for a scarf, using a navy warp.


I spun some 100% merino and plied it.   This is 338 yards, wet finished and ready to go.  If I have enough after doing the numbers for the above mentioned scarf, I will dye it dark blue and use it as the weft for the scarf project.   I'll do it on a table loom though, so there is less loom waste.  I still have more merino roving so I can always spin up more if necessary.      

We checked the long term weather forecasts a number of times.  They kept saying we'd have lovely above temperature days and cooler nights, so we figured it was time to put the spiles in the maple trees.  As soon as we did so, we had a weather forecast change and now we have put our sap buckets out with a week plus of cold weather.  It's below freezing during the day, so no sap will drip.  :(  We should have waited a week.    We did have one day when the sap ran, but it's been so windy, we left the sap to freeze in the buckets to hold them on the trees.   There wasn't enough to do a boil anyway.


July 17, 2019

Singing the Blues

 I started the Japanese Indigo seeds in February, in hopes of getting some seed.  I planted it in the garden a bit early, putting it under plastic cloches from the dollar store.   I planted a couple of plants without the cloches to see what difference they really made.   The Indigo plants under the cloches were definitely happier, with more growth, larger, and noticeably more lush.   This enabled me to do a small dye vat the other day.   I cut 550 g of leaves and stems.   I took some of the leaves from the stems, but I'm not horribly careful about it.  It's a lot of extra work and I don't think it makes a lot of difference.

I set up a double boiler system with my dye pots, putting some water in the larger one and then setting the smaller one inside it.   This makes it much easier to keep the Indigo leaves from getting to hot.    I put the leaves in the pot and filled it with lukewarm water.   I use a candy thermometer to keep an eye of the temperature.   It needs to cook for about 2 hours, getting up to about 160° F, and no higher than 180° F.

Every once in a while, I stir and squish the leaves  to make sure every one of them gets time covered in the hot water.    It's also important to keep an eye on the water level in the larger pot, to make sure the water level doesn't drop too low.

When the temperature gets warm enough and is there for a bit, the leaves start to look a bit wilted and a scum forms on the top.   This is a good thing as you know the pigment is being released.  The scum is a brownish colour, sometimes with a bit of blue or green in it.

When the 2 hours of cooking time is up, it's time to drain the leaves into another pot.   Using rubber gloves, squeeze the hot leaves to get as much of the brown liquid as possible.  They are really hot, so I take very small handfuls, which are easier to squeeze out anyway.    The remaining leaves can be boiled up for a second colour, but I`ve only ever done that with Woad leaves.  Because the Japanese Indigo has so much more pigment, I`m usually ready to clean up when I`m done with dyeing blue.

Anyway, take the brown liquid and add some soda ash or baking soda.  You can also use ammonia, but it smells.  Baking soda works just fine.   Then you need to aerate the liquid by either pouring it back and forth between two buckets, or I use a dedicated stick blender.  It`s permanently dyed blue, so easy to know it`s not for blending foods.

When I`ve aerated the liquid from Woad plants, I usually get little specs of dark blue sitting on top of the foam.  With the Japanese Indigo, the foam often just goes a pale blue, greenish colour.

The final step is to add a reducing agent.  I use Thiourea Dioxide (Thiox).   It`s neat to watch the foam break down and disappear almost immediately after adding the chemical.  You can use spectralite as well, but thiox is available more readily around here.

You need to let the vat sit for a while while the air is worked out of the vat.  A metallic looking scum will form on the top and the vat will turn green or greenish brown when ready.

I had put some fibre in a tub to soak part way through the initial heating time, so it had been soaking for over an hour.   I put it in the vat, let it sit for a few minutes and then pulled it out, carefully squeezing out the excess liquid near water line, just as the fibre came out of the dye.  This supposedly helps eliminate excess oxygen getting into the vat.  

It comes out green and as the air hits it, it starts to turn blue.   If you want darker colours, you need to use multiple dips with airing time in between each dip.

Eventually, I ran out of fibre and the vat was giving lighter blues, taking several dips to get to where I wanted the colour.    Indigo doesn`t need a mordant.  Although it is a little bit of a fussy process, it`s fairly simple if you follow the steps put out in most of the natural dyeing books.  I like Rita Buchannans  A Dyer`s Garden.   Look at the pretty blues!


January 21, 2019

Kettle dyeing warps -the start

I've been planning to do a project using double weave -  a weave structure where you weave 2 layers at once.   This can be to bring up secondary colours into a project which wouldn't normally be possible, or to make tubes, attaching at both sides or in my case, because I want a double wide fabric, without having to stitch it together, I'm going to be attaching it at one side.   It's going to be a wool blanket/cloak.

  I wanted it to be brown.  I have brown wool, but it's the wrong weight.  In the wool I had planned to use, I only have dark green, white and red.  I realize that if I did the warp in green and the weft in red, it would likely appear brown from a distance, but when I twisted the two yarns together, there was still to much contrast for me.  I didn't want a green and red flecked blanket!   So I decided to dye the green.    I looked at my large cone of wool yarn which weighed about a kilo and realized I'd have to skein it off before dyeing.   I figured I'd skip a step and dye warp chains.   This is a valid way to dye and often is used in painted warp techniques.
figure 8 tie on remaining warp length

As I was winding my warp, I realized that this was a good time to document some of the ways to do this, or at least the way I was doing it this time.  In order to let the dye circulate around the fibres, instead of choke ties, I use figure 8 ties.   They keep the warp in order but still let the dye reach all the fibres.  If you don't do this, you'll get tiny white spots... ask me how I know!

I do put a choke tie at each end of the warp.  I tie it really tightly.  This keeps the warp in order it two places, so I can shake it out and still have control.  I also tied the centre of the cross securely, although not so tight it's bunching together.  Just enough so it's flat.  There may be a bit of white there, but it's in the thrums or loom waste, so it's fine.   I could tie at least the two cross ties near the very end tightly too, but I sometimes find it squashes up the warp for a bit down the line.  Since I wasn't as generous with the loom waste as I usually am, I used figure 8 ties to be certain.  

The figure 8 ties down the rest of the warp are at least 1 per yard.  I'd rather have two many ties, than end up with a tangled warp.   Painting the warp and steaming it has little movement of the warp, so it's safer.  However I'm kettle dyeing this, so tangling is more of an  issue.   Better safe than spending hours untangling.   It's not like I have tons of extra yarn as I had only 1 cone of the green.

I had 5 warp chains.  Only 100 threads would fit on my warping board smoothly and I was fine with that as it would dye more easily in smaller bouts.  Two of the chains were for either side of a single warp strip to be on one end, so they were specific numbers to make up the width.    I stuck them in a pot of warm water to soak all morning.   When I decided to dye, I'm glad I took them out of the pot because this is what the water looks like!  YIKES - that is a lot of green.

I ended up changing my process slightly because of this dye running from the original skeins.  Instead of dyeing in a deep kettle, where I was going to have to do 2 carefully calculated batches to hopefully the same colour, I used the pan I use for low immersion dyeing and zig zagged them fairly close together.   I doubled up the vinegar but the same amount of salt and will add half the vinegar to start and the rest, half way through.  I have a few concerns that something will not work right. The brown dye seems to have absorbed but there is still green seeping into the water.   The yarn has no brown to it yet.   I will play around with adding some red to it as well, since red and green make brown.


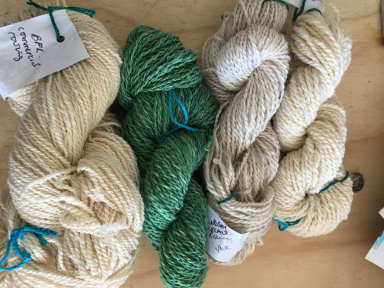
Here are some squishy, dense, fat yarns that I'm spinning up for sample rug hooking tests.  The two from the left are nice and were nice to spin.  The third white one, was kind of icky.  It was a commercial roving that I didn't like at all.  It was easy to spin though.  I may save it for a beginner spinning class as it gives good results.  The last one is a nice yarn but oh, so much work.  It was the fleece I've been washing.  After that found that it was best to run it through a drum carder and then to comb it to get the VM out.  Most of what didn't come out in the combing, came out in the spinning.   A lot of work in comparison to the finished product.


October 09, 2018

Eeek how time flies

A perfect gluten free and dairy free pumpkin pie.  The crust turned out to be quite easy to work with, unlike my previous attempts at gluten free pie crust.   The pumpkin was one I processed myself and the whole pie turned out to be not overly sweet with a tender crust which wasn't soggy or gritty.    It was absolutely delicious.   It was pretty too!

 The navy and brightly coloured yarn plied together.   This is the partial bobbin that I'd spun up as a tester.  I'm still spinning the rest of the navy for the full bobbin.   It definitely subdued the bright colours, but since I was worried about muddying the colours up when they were plied, this is definitely not muddy!  I rather like this combination of colours, even though I'm not always a huge fan of marled yarns.
I had just about 100 g of superwash merino left in the bag.  I tossed it in the pot with some brown, blue and black dye.    I'm really happy with this bit of fibre.  I like the more subdued colours in this batch.  It's a bit of a change from the bright colours I often use.  I used weak acid dyes, with a low immersion technique.


It's been crazy busy here.  Some days I didn't even get a chance to practice the banjo because it felt like I was hardly home.   The grey, wet weather has been putting a damper on things too, as it's been delaying projects.


I made this hat.  I need to needle felt some decorations for it.  I made a second hat in a different style, without the brim, which is going to get some embroidery on it, if I get the time.

August 14, 2018

More Colour Experiments


I did a few more low immersion dyeing experiments last week. I had some fibre reactive dyes which needed using up.  Dyeing protein fibres with fibre reactive dyes is a similar process as using acid dyes.  Slightly different percentages, and a bit of synthropol added to the mix.  Heat is needed to set the dyes on wool, rather than time as on cellulose fibres.   This multi-coloured batch is a bit larger than the others as well, as I had about 130 g of the same blend fibre left in 2 bags, which I combined. My main worry with this batch was the fibres were a bit crowded.  I had to be quite careful that the bottom layers of fibre were dyed adequately.   It turned out quite spectacularly for a random blend of colours.

I had enough old dyes for two experiments.  Then I took the time to mix up new dyes.   This is fuchsia and  turquoise.  It is 100 g, which seems to be a good amount in my pan for this type of dyeing.   It turned out quite lovely, with the bright but not glaring colours and gentle colour transitions.  I lay the roving in the pan in a zig zag fashion, across the narrow end of the pan and back again.  I poured the dyes on in layers or in rows, from lighter to darkest, in the pan, keeping the same back and forth motion with the dye application as I'd used with laying the fibre in the pan.  This one was fun to see take up and set.


 Oh, the brightness of this one.  This is for spinning on a dull, grey, winter day.   I used yellow and fuchsia, in random splotches.  It made my day when I pulled that out of the dye pot. 

The one below used fuchsia, blue and black.  It was also with the end lot of the old dyes.   I left a bit of white fibre on purpose for mellowing down the colours.   This is a blend which I'm betting looks awesome when spun.  I love to see how some of the fibre colours appear to change once they are spun.  The blending of the colours makes a lot of difference sometimes.

Today's experiment is solar dyeing.   Really, our weather in July was the prime time for solar dyeing, but I'm doing this at Westfield on Sunday, so thought a few experiments to show would be nice.  These two are using fibre reactive dyes.   I've also got food colours and the Kool-Aid powder that we found when my daughter and I were out fabric hunting in July.   I've lots of bits of fibre from random fleeces which I'm using.   
 I'll do up a post with a better explanation of the solar dyes, once I've got a few more samples.  The pink jar is leftovers from the last dye session and the multi coloured jar is just splashes of 3 different colours, applied to different areas of the fibre in the jar,  with a syringe


June 22, 2018

Low Immersion Dye Experiment 3

This looks like it should be a cheesecake or some other yummy dessert.  It is actually the moment after I added the dye to my low immersion experiment 3.  The fibre, 150 g of a merino/cashmere blend, was soaked in 3 litres of warm water and 125 mls of household white vinegar ( the stuff you buy at the grocery store.)     The pan is sitting on the stove, over 2 burners.

I did the math for dye amounts  ( WOF x DOS / % Dye stock )    I came up with 75 mls of dye.  I decided to use no more than that for this experiment.     I measured the dye with a syringe and drizzled it over the wet fibre.   I turned the burners on to low at this time, so that the water would start heating.

Exhausted acid dye bath is clear!
I have a chop stick that I use to gently lift the fibres to make sure the colour is penetrating.  I had to use it a bit as the fibre was quite well packed in places.  As well, most of this is not quite pencil roving, but quite thin anyway, so twisted in places and not easy for dye penetration.  I did a bit of moving and untangling the roving in a couple of places, just to make sure I didn't get white spots.     I kept the dye bath at a simmer, until the water exhausted and kept it there for a bit longer just to make sure the dyed fibre had the best chance at being colourfast.

I'd watched a couple of you tube videos about this technique and there were a number of them which showed brightly coloured water, with the commentary " Look, the dye has exhausted and we can remove it now".   This is what an exhausted acid dye bath looks like.  The water should be clear and not coloured!  If you use too much dye, the water won't exhaust and it is a waste of  dye.

It is important to let the fibres cool slowly, to avoid felting from temperature shock.  I let it cool in the pot.  The nice thing about a rectangular pan with little water, is that the whole lot cools down in only a couple of hours.  After a quick rinse to make sure there was no residual dye, and a spin in a dye dedicated salad spinner, I laid the fibre outside on a drying rack, covered with screening.  With the breezy days we've been having, it dried in no time.


June 15, 2018

Low Immersion Dyeing experiment 1

4 hours of soaking without heat - unintentionally
 I decided to play around with some low immersion dyeing techniques.  Usually, I use a 40:1 water to WOF (weight of fibre) calculation, which allows the dye to mix in evenly and give great solid colours.   With low immersion, you purposely use less water to keep the dye from moving too freely, and more vinegar to help the dye strike quickly.    It's a technique to create varigated yarns and fibre locks, in a disorganized fashion.   That just means you can't really plan where the colours will fall and will probably get some surprise colour blending.
So, I started the first batch by picking a whole lot of mohair locks.  I laid them out in the pan with about 3 litres of water and a half a cup of vinegar.   You can use vinegar or citric acid - both work just fine.  Vinegar is cheap and available locally.  I have to order citric acid in.  It's more expensive, but you use less.   Generally though it's the shipping which is over the top.  

mohair locks after heating and drying.
It started to rain just as I was getting ready to add the dye.  It was a hard, torrential downpour, with crazy winds.   It only lasted 10 minutes though so I added the dye, navy, yellow and a tiny bit of grey.  I had just added the grey, leaving some white spots when the power went out.   I'd hoped it would be just a flicker but it was about 4 hours later before I could start heating the fibre.   By then the colours had migrated over all the white fibres.

It took ages and an addition of extra vinegar to get the dye to exhaust.  I'd obviously added too much.  In the end, there was little yellow or blue but just a jumble of different greens.  Pretty for sure, but not what I'd hoped for.  At least with the power outage, it wasn't a complete failure.

I used one of the bags of level 6 project fleece and tried again.  This time there was no power failure.  The colours held quite well and I was happy enough with the final colours of the locks.   I'm worried that the locks spun together might make a muddy coloured yarn, but as locks used for novelty yarns, or adding to white they could be quite stunning.

Now I have some more ideas to play around with.  Trying this with sock yarn could be spectacular.   Maybe I'll give it a go with some sliver as well. The colours could be a little easier to play with.  I'm pretty sure you wouldn't want to use too many colours with this technique or you'd risk getting lots of muddy browns.

It's lots of fun though.  These were both acid dyes on protein fibre locks.


July 18, 2017

Projects and Kevin update

This is a 238  skein of white Egyptian Cotton, 2 ply.   It took forever to spin, mainly because sitting still for hours at this time of year just doesn't happen.   It's a nice skein and will go into my stash of handspun cotton skeins for a future project.   I only spun 1 bobbin full, then I wound about half onto another bobbin for plying.
The cotton is a commercial sliver.  When I first started spinning cotton, I had to card this sliver into punis before I could spin it.  I realized half way through this bobbin, that I had started spinning from the sliver, with no thought about it.  Really, it's all about practice, practice, practice..

I had a bit of an idea pop into my head and decided that I would weave up some inkle bands.  My inkle loom is very pretty, and is beautifully hand crafted.  Unfortunately, it has a little bit of an issue with the placement of the pegs, making for a very small shed.  It made the whole project take much longer than I'd expected and it was frustrating at times.  I used 4/8 cotton, so it should have been pretty nice to weave with, but it seemed like I was wrestling with the warp the whole length, and it wasn't horribly fun.    However, I need to weave off another 6 or so lengths, so I'm going to have to figure something out to make this work better.   I had suggested my sweetie might want to make me a new inkle loom, with some small adjustments to the pattern, but the roof needs reshingling first and apparently that comes before fibery activities.  ;)

I did make this little narrow wares width guide for my next project.  It's just a strip of plastic, folded in half.  I used the plastic from a 10 litre water jug that I found in a recycling bin.   I think a juice or milk jug,  would be easier to work with.  This was pretty tough cutting.   It may still be too long as I put on both 2 inch and 2.5 inch markings.

My sweetie woke me up this morning at 6 am, to tell me that a chair had tipped over and there was a pile of green yarn on the floor.   Sitting nearby was Kevin, just looking around as if nothing was wrong.   While he normally isn't a playful kitty, when he does play, he goes all out.   This was a freshly dyed skein of 4/8 cotton.   While I can see some of the figure 8 ties, the rest of it is so tangled up that I'm not sure I'll be able to use it.    And my husband wonders why I call Kevin the" Bad Kitty".


July 05, 2017

Spring berries and blues

The red currants have started ripening.  Usually they all ripen at once and I simply have to strip each little hanging bunch off the branches.  It's fast and easy.  You don't have to take the berries off the stem to make jelly.  This year however, the berries are ripening at different times.   I have to get out there and get them before the Orioles and the Red Wing Blackbirds eat them.  They can strip a bush of it's berries in a day.  So, I've gone out picking individual currants.   Two days of picking has netted a whole 340 g of currants.   I skipped today in hopes that I'll be able to get a larger amount tomorrow.   I'd love  to get a kilo of currants, but I'm not counting on it this year.  The bushes seem to have far fewer berries than other years.  A kilo will make a decent sized batch of currant jelly.

This past winter I started some Dyer's Knotweed seeds much earlier than normal, in hopes of getting seed to set this year.   Usually it blooms in September and there isn't time for the seed to set.   The seed that I started in February germinated nicely.  I transplanted it into large pots and again into planters, though the last one went into the garden.     I noticed that it's starting to flower!   Yay!    However I decided to snip off the stems that weren't flowering in hopes of a) encouraging more growth and b) to see if there was viable pigment in the leaves. 

  I harvested 14 oz or just under 400 g of leaves, which  I weighed once I'd stripped them from the stems.  Although I don't think it's a necessity to do so, it takes less space in the container to cook the leaves without the stems.  I stuffed them into a glass jar, set a trivet in the bottom of a large pot filled with warm water, and set the jar into that pot, making a double boiler.  I cooked the leaves at 160° F for about 2 hours.   As I was lifting out the jar, the bottom sheared off the jar, which was startling to say the least.  Luckily, the entire mixture dumped into the large pot, saving an enormous mess.  I would have added more water to the dye vat anyway, so it was all fine in the end.

I did have photos of the entire process, but some how I managed to lose them when I transferred them to the computer and deleted them from my camera.  Normally I check to make sure they are where I want them before I hit the delete button, but for whatever reason, I convinced myself it was all good today.


At any rate, there was a reasonable amount of pigment.   I don't know if I aerated the mixture long enough though, so it might have been a little more.  I didn't weigh my fibres before I tossed them into the pot, as I was just playing around.   There is Blue Faced Leicester, a Cashmere/Merino/Silk blend and both cotton sliver and spun cotton in there.

June 17, 2017

Painted warp and hand card catastrophe

 The past few days have been busy.  I've played in the garden.  I was so excited that the pumpkins had germinated that apparently when I was on the phone with my daughter, I yelled.   Since nothing grew in that area last summer, mainly weather issues, it was great to see the pumpkins growing this year.  I had to put a lot of sticks in the area to keep the chickens from sunbathing in the pumpkin patch.

I have finally started putting the multi coloured dyed rug warp on the loom.  I know it was a rescued warp -  a whole lot of threads removed from a guild project that wasn't working out as planned.   The threads were removed, a cross put in them and it was chained.  The cross wasn't actually a true cross.   The cross keeps the threads in order.  Without it, there are a lot of randomly bunched and messed up areas.   I did finally undo the chain and add choke ties.  What is messing me up right now is that not all of the threads were caught up in the cross, so there are loose threads periodically.   Those just get tangled up.  There was a large handful of really short bits that I found by accident and luckily didn't try to thread those, plus I caught them before I started winding on the warp.    I'm having to comb out parts of the rest as I wind it on to ease out the tangles.  It's not my favourite way to put on a warp, but it's a rescue warp, so I'm happy to get it used.  Plus, look at those awesome colours!   Pain in the patootie to dress the loom aside, the colours are fun to work with.

I did a lot of hours volunteering this week.   I went into a grade 4 classroom and answered a lot of questions about the Middle Ages.   The teacher sent me a list of questions.   I dug around and found Illuminations which illustrated the answers and did the research for the rest.  In all, the questions were really interesting and thought out.   The follow up questions from the kids in class, were also thoughtful and good.  The kids were amazingly well behaved and I enjoyed it very much.


In the grade 3 class, I did some fibre activities for the pioneer theme.  Sadly, my hand cards were damaged by the rougher kids.    I really like my handcards.  These ones have a gentle curve and the carding cloth works with a lot of different fibres.   I'm hoping they can be glued and clamped back together.  It isn't in the budget right now to replace them.  

Garden update:   The birds ate all my bean plant seedlings.... talk about unhappy!  Well the birds are happy.   I have little leafless stems sticking up from the ground, which doesn't make me happy.   They ate every single one of them!

June 07, 2017

Painted Rug Warp

This is the 11 1/2 yard white rug warp which I ended up with when last month when we were clearing out the guild room.   It was stark white and while it would have made perfectly fine rugs.  With the denim and solids I have on hand for the weft, they would have been plain, serviceable rugs.  My imagination started working, so I dug out the Procion MX dyes and mixed up a set of primary colours at 2%.  I used 2% strength, only because that was what I'd previously mixed up and the storage jars were already labelled that way.   It ended up being a better idea as I needed less dye volume, and was easier to work with.

I started taking a series of photos, but conditions weren't conducive to good pictures.  It was a grey, really cool day, threatening rain.   It was also very windy.   Every time I grabbed the camera, something tried to blow away.   Since I was working on the deck due to the size of this project, in the ended up just playing.  

I used Procion MX Fibre Reactive dyes, which give lovely colours and are relatively safe to use.   The one downside is there is a bit of rinsing since the dyes bond both with the water and the fibre.  The upside is you don't need any heat to set the dyes.  

I draped plastic wrap on the patio table to both protect the table and to use to wrap the warp chain in afterwards to keep it damp and protected.   It would have been smarter to use a sheet of plastic like a cheap table cloth, vapour barrier or an old shower curtain to protect the table.  The syringes were a gift from Carol who has Alpaca ( and a brand new cria which was born yesterday)  Yay!   They are perfect for measuring out dye for painting the warp.   I like that I can dilute the dyes as well, but filling half the syringe with water and then just adding the dye.  This makes it easier to adjust shades.  The plastic wrap wasn't enough to actually seal the dyes in the chain, so there was a bit of seepage and some of my oranges and bright yellows are more burgandy and brown.   I let the warp sit and cure for 48 hours because it never really got warm.  Cooler temperatures equal longer curing times for good colours.  The warp is still damp, so it won't be quite as bright as this when it's dry.

I wasn't really going for any particular colour range. I didn't measure rug lengths and change colours for each rug, or even plan anything ahead of time.   In my mind I saw rugs with bright splashes of colour to add interest.   I'm pretty sure I've accomplished that with this warp. Now I just hope  the finished product looks as exciting as the pictures in my imagination.

The sad thing is that I will most likely not be selling these rugs or any of my handcrafted items at the guild shows this fall.   My guild is spectacularly unsupportive of hand spinners, which is mainly due to the attitude of a small number of members.  I've been told that no items will be allowed which are made with hand spun yarn as all hand spun items are only suitable for church bazaar items (meant in a derogatory manner).   Most other guilds who have spinners, don't seem to have an issue with this but apparently ours does and I'm only allowed to put in skeins of hand spun yarn.   So rather than change what I do, I'll just change the venue where I sell items.   It makes me unhappy in a way, as I do a lot to support the guild, and the commission would help the guild bring in speakers and pay for a new site when we find one.  The upside is that I'll likely have less commission to pay and may be able to put a wider variety of items for sale, especially if I go the Etsy or FB page sales route.   I just need to figure out how to set those things up.


October 27, 2016

Breaking Food safe dyes

Food colours and Kool Aid are fun and fairly safe weak acid dyes.   A tad unconventional in terms of commercial or professional dyes, they are great to use with kids and if proper processing is used, they are fairly light and wash fast.    They can be more expensive than non-food grade acid dyes.  The downside of Kool Aid (unsweetened), which works quite well because the citric acid is included in the little packet, is that in our area, you can get only 1 or 2 flavours so have limited colour selection.  In the US, they seem to have a gazillion flavours and I've seen colour wheels done with Kool Aid there.

However, Wilton's Paste food colours, for cake decorating are readily available, work with vinegar and a couple of colours have interesting properties.   Violet and Delphinium Blue are made up of several different colours which get absorbed at different rates.  This means you can  force the colours to break or be absorbed separately, creating multi-coloured yarn or fibre from one solid colour dye pot.  

Delphinium Blue Dye
I had some Merino fibre which I had bought, which was seconds and fairly expensive for seconds which didn't quite burn test as wool and was pretty nasty to spin, even after washing.  The vendor assured me it was wool and it sat in my stash for a couple of years.    It was the perfect fibre to experiment with, because using it for something  was better than it sitting there waiting for the moths.   If I was lucky, whatever was making it icky, would finally get cleaned off it and I'd have nicer and pretty fibre.

Violet Dye

I used about 1/2 tsp of dye to a couple of litres of water and about 1/3 cup of vinegar.  Because I had to rebatch the Delphinium Blue with extra vinegar, next time I'd add about 1/2 cup of vinegar.  I used a fair bit of fibre though.  I prefer to use my smaller pot, which is quite deep, so that the fibre is sort of sitting in layers.

You can soak or put the fibre in dry.  Usually I soak, but with my kitchen still in pieces, I tossed most of it in dry.  Mostly it was fine, but there was a bunch which must have been coated with something because it required some help to get it wetted, both in the dye vat and in plain water.

Delphinium Blue with broken colours
The dye has to be heated up to just below boiling - about  185° to 208° if you want to stick a thermometer in it.    Then you push a handful of fibre in the vat, poke it in carefully, about 30 - 60 seconds later, push in a second handful, and 30 - 60 seconds later, push in another handful of fibre.   With a skein, just dip and dunk or slide part in each time.  If you got the temperature right the  dye will dye each handful with a different colour component of that dye.   If the temperature it too cool, you will still get awesome colour gradation.

Delphinium Blue gradiation colours - cooler water temps
 Here is the part that makes the dyes more colour fast.  Once the fibre is in the pot, the dye will exhaust fairly quickly.   If the water isn't exhausting, add a bit more vinegar.  Let the dyes simmer slowly bringing it up to the 208 mark for 30 minutes or so.  

I've had fibre dyed this way for over 10 years with minimal colour fading, including a pair of mittens that I wore non-stop for several years.

Violet Dye with broken colours
 You get fun effects with little equipment that you might already have on hand.  Safe and fun to do with kids and lets face it, fun for adults.  Sometimes you don't want to drag out the scales, calculator and record book to mix a bunch of dyes.  That being said, if you measure accurately and record your results, you should get fairly repeatable results.

Some days though, I'm up for a bit of serendipity.  I'm pretty happy with these results and yes, some of the dry fibre is light, fluffy and finally feels clean.